Some time ago I had several 3D resin printers – today I have but one. Due to shortage of space I passed on all but my AnyCubic Photon Mono printer. I started this blog in Apeil 2023 and here I am printing out buddhas in September (see end).
And there it was sitting in a corner as I have WAY too much to do and far too little time so I’ve not done any kind of printing for the past year or so, when, out of the blue, the Zhuhai Sunlu Industrial company contacted me to ask me if I’d like to check out their “High Toughness Resin”.
As you do, I said “yes, sure” and before long, a 1000g container of their solid grey resin was on it’s way, along with a similar size container of “Sunlu Resin Detergent”.
I figured I’d print out a standard BABY YODA model from Thingiverse – completely forgetting that I’ve changed PC since I last did anything with 3D printing. So, first things first, I went off to the Chitubox site to get the latest free Chitubox “SLICER” software which converts a standard .STL file (or files – file in my case) to the format that my AnyCubic Mono printer supports – i.e. .PWM0 files, Back up a tick… .STL files are the end product of a 3D model someone has created. .PWM0 files are as far as I know particular to my printer.

So I skipped having to remember how to create an .STL file by using a freely-available model out there in Thingiverse. Next, I had to remember how to HOLLOW out the model of Baby Yoda in order to avoid using up a significant amount of my bottle of resin for one test which may to may not work. Thankfully “HOLLOW” is a main menu option in Chitubox, so basically the things I had to so were to position the model on the on-screen XY base, scale it to what I wanted, position so that nothing is outside of the range of my resin printer – and then hollow the model out. 1mm walls seemed sensible for reasons I barely remember. All of this took seconds.
The next and final step in Chitubox was to SLICE and SAVE (2 button-presses). Save in the case of the AnyCubic means save to memory stick. The operation of the printer is quite basic, you can’t USB or WiFi send files to it as it has no such facilities – so – you dopr the .PWM0 file or files to a USB stick and plug that into the printer. If all is well, you select the file and press STARt- and several hours later, out pops a model ready to be dried off by sunlight or a UV lamp if you have that. Normal internal lighting will do that SLOWLY as well.
Thinking about it I could probably have speeded the whole printing process up by lying the model on it’s side in Chitubox. Oh, well, too late now.
I simplified the SLICE instructions as I’m using default settings – it may turn out yet that I should have adjusted things like exposure time, base thickness etc but up to now I’ve always gotten away with defaults – the package knows which printer I have and this resin has settings marked on the bottle which look fairly standard. Time will tell.
If I had more space and more time, I’d do as lot more resin printing – it is way fun IMHO than “normal” 3D printing – others may disagree. The printer has a cover over it to protect your eyes if using clear resin from any UV light from the printer exposure screen – and equally importantly to keep dust out.
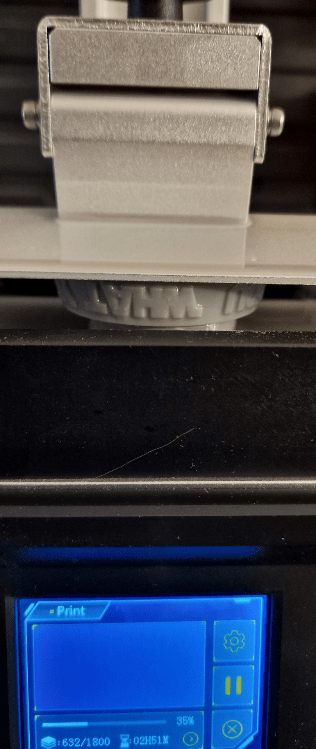
I’ll re-phrase that, it’s more like watching paint dry than “fun” while the printing is actually taking place – and of course if the settings weren’t right, it’s back to square one. Thankfully the printing operation takes NO interaction so you can be doing something else at the time and unlike my laser engraver, I’m not detecting any awful smell while the process is going on. Printing time on resin printers is dependent on height as the resin hardens from light in the printer screen base in VERY thin horizontal layers as the model is slowly created/
Good news – at 35%, the model has not yet dropped off the base so there’s a chance I might be onto a winner…. (I took the yellow cover off to see that grey intermediate result – just for a moment) – and now I’m off to watch an episode or two of “The Diplomat” while the printer creates Baby Yoda (fairly) quietly in my office.
I guess it’s going to be the UV lamp then, there’ll be no sunlight by the time this is finished. I could of course leave the whole thing in the printer overnight – but that COULD make cleaning the printer that bit more difficult so I’d rather finish off in one day.
And 3 hours of TV later – quick wash in the detergent then in soapy water and it’s done – I could probably have just as well have used isopropyl alcohol for the first stage – it is widely available and cheap here in Spain 96%, 1 litre costs €6 but that may not be the case elsewhere. I never did use any special lighting…
Here he is, half an hour later, bone dry, nice finish, using the Sunlu resin.

Actually, you may be thinking – there’s a thin horizontal line around his tummy – yes, there is – and I think the fingers on the hand at the back (exact same height) have been stunted – but I also seem to recall hearing something odd at about that position in the printing – could be an issue with the printer having sat doing nothing for months – I don’t believe for a second that has anything to do with the resin.
September 2023 Update

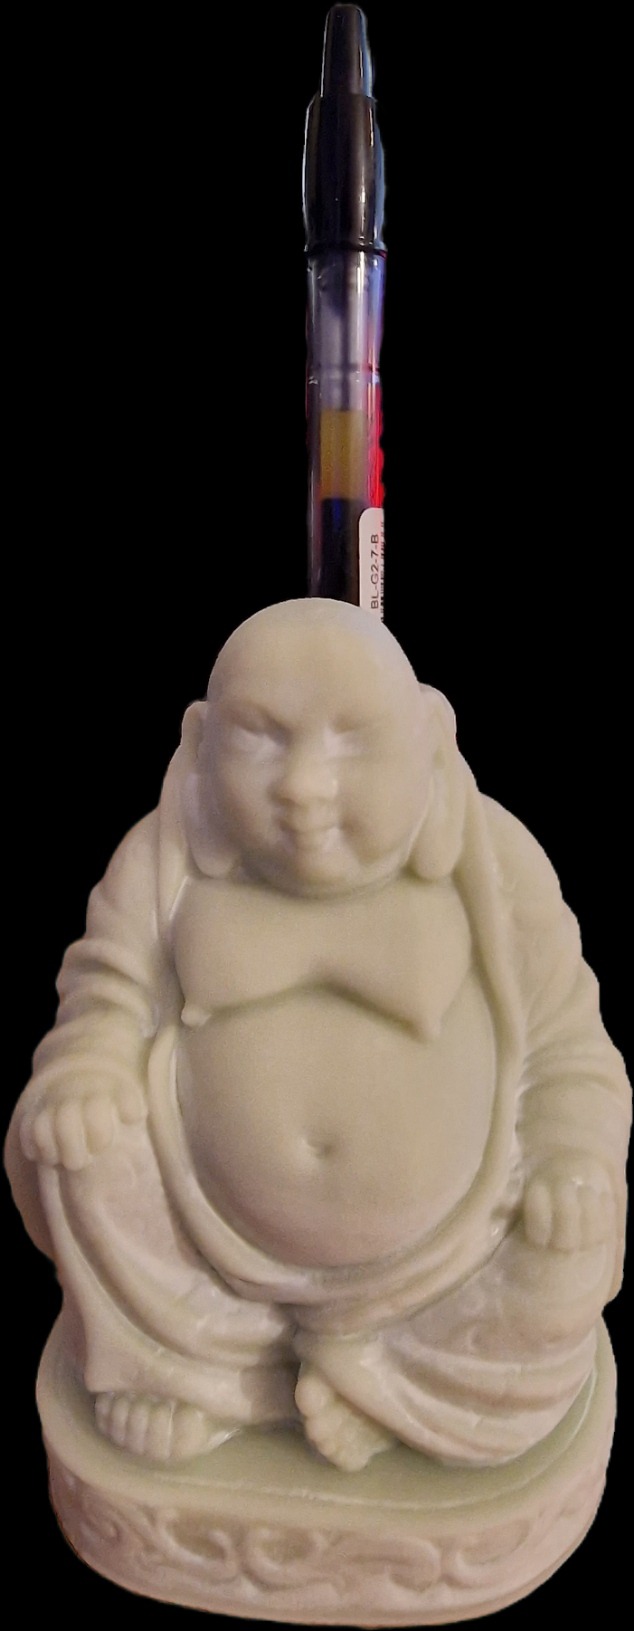
At this point I’ll mention the Sunlu Water Washable solid white and solid orange resins – just made my first standard buddha – flawless (hollowed out to 10mm thick to save resin) using the white, on standard settings on my AnyCubic Photon Mono printer. Several effortless hours later – here he is.
The Sunlu resin came in 1 litre bottles and requires nothing more than clean water to remove from the model and the printer (a little soap doesn’t hurt). I finished the job off with 10 minutes of sunlight on the model and now it sits on my desk, bone dry.
Why does it have a slight green tinge? No idea but it does.
The model was supposed to have a pen holder on the back, looks more like a candle holder to me, though the model designer might’ve been thinking of several pens. Now I think about it – a candle holder isn’t a bad idea.

Well, this has been a lot of fun.
I’ve printed out lots of models for our home and for friends – I guess the next thing will be to stop pontificating and develop my own skills to make the original .STL models instead of using someone elses which come generally from Thingiverse (free models) and are converted to one of my printer formats by Chitubox, a free program with which I have no issues at all as it is reliable and easy to use – just like this new (to me) resin.
I can of course only speak for the PC version (Windows).
Ah yes, now I look at it, the back part does make a good pen holder 🙂
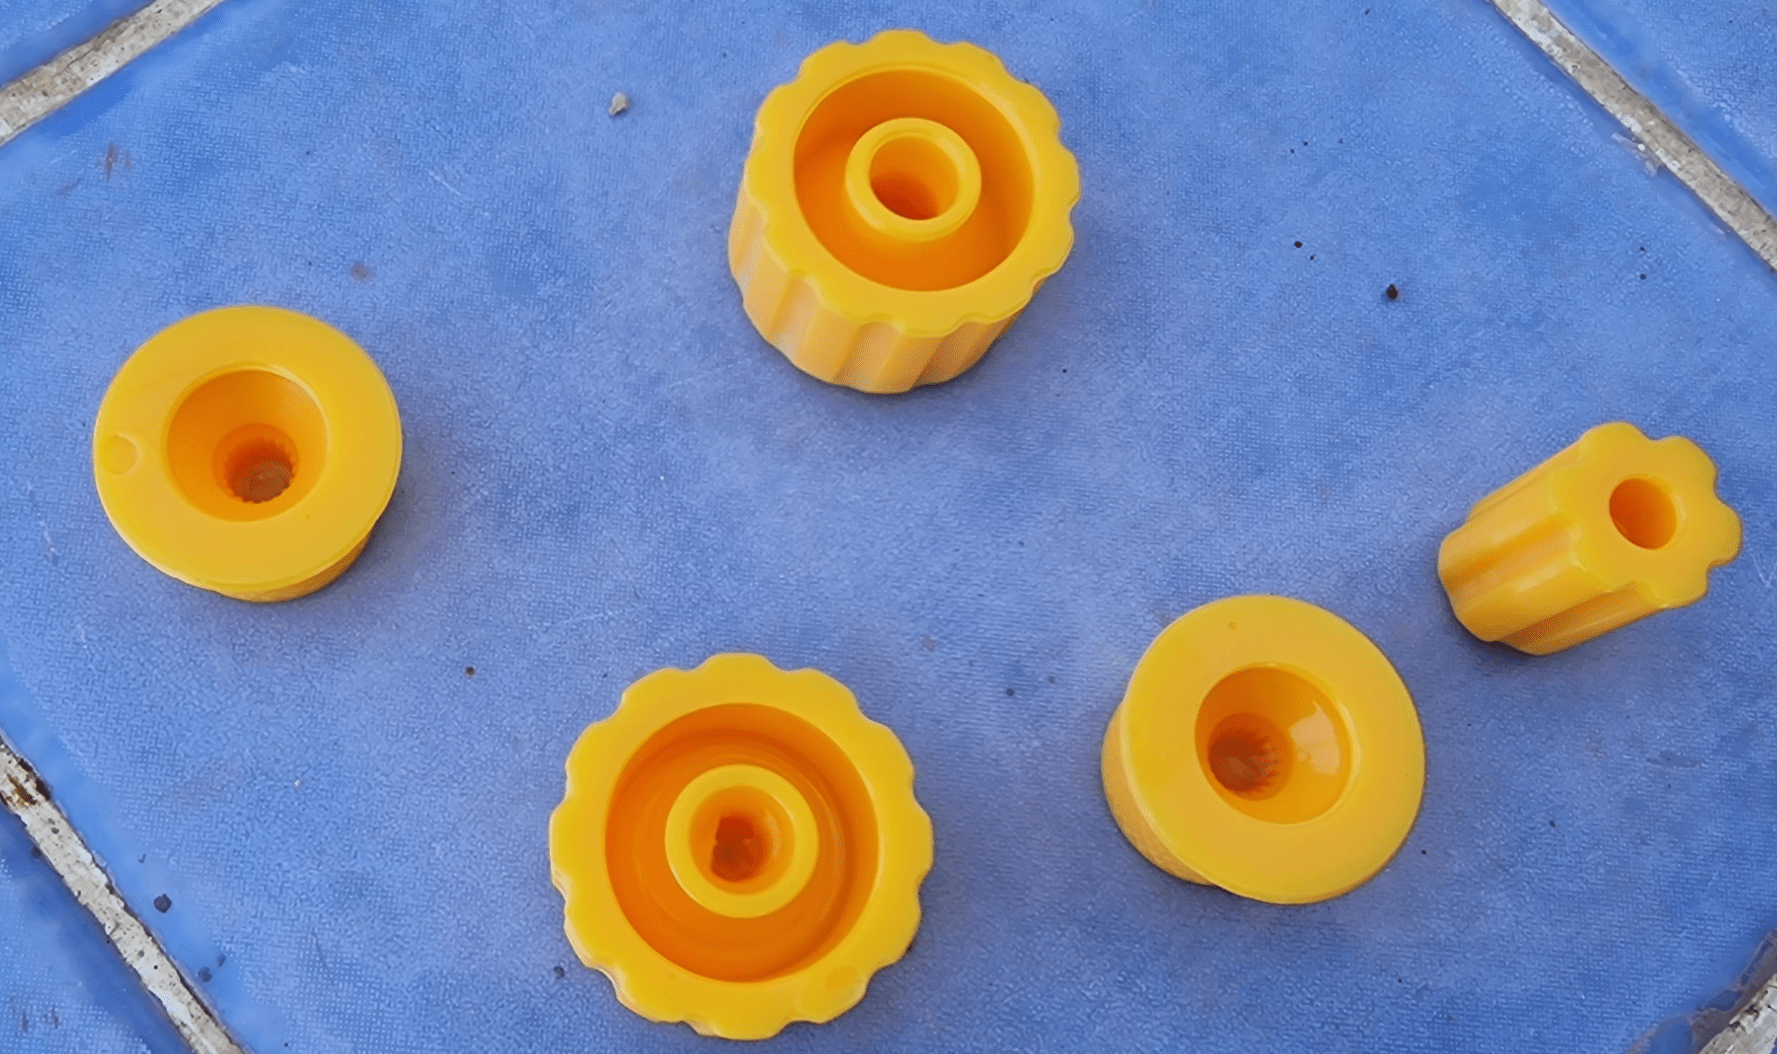
Next – the Sunlu water-washable orange resin soon as I need a couple of replacement conrtol knobs.
Some day I’ll figure out how to extract photo objects from my phone with the background truly transparent instead of black…