

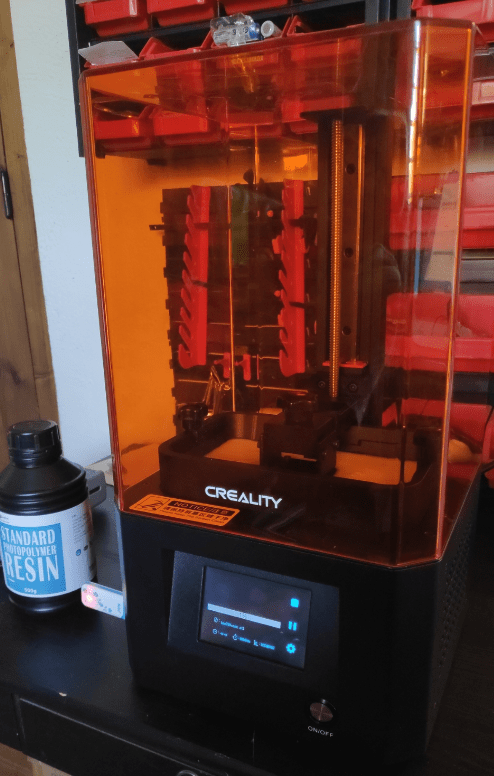
For those looking in for the first time, The is not to be confused with the LD-002H which has improved speed and slightly increased cost – so we are looking at a USB connected printer which accepts files on a memory stick for printing.
In the beginning
How hard could it be to print a simple test model on the ? First things first, I had to go it and buy some 3D printer RESIN online and a bottle of isopropyl alcohol (local Chinese store) for cleaning.
A friend of mine gave me a simple file (.STL) – the output file from a 3D design program like Fusion 360 (or as I just discovered – Tinkercad) – a louvred case for a BME280 humidity sensor. All I had to do was pop the liquid UV-hardening resin (creamy-white in this case) onto the USB stick supplied with the new printer and select the file. WRONG. This model of printer does not take .STL files – it takes .CTB files, created in the freely available Chitubox PC program, from standard .STL files – had I read this before starting, I could have saved hours. Later I will refer to the (can be free) Lychee Slicer program for which I now have a full licence – but that’ll wait.
So, armed with an original .STL file and the output .CTB file from the above-mentioned PC program Chitubox – in the USB stick, I guessed how much resin I would need – in this case – Shenzhen Weistek Standard Photo Polymer Resin which I picked up from Amazon.
You can quite inexpensively purchase a wide range of colours of photo-resin both clear and opaque. The amount does not have to be precise as you can always pour the excess back into a spare darkened bottle (it is recommended NOT to mix new and used resin – though I have done – up to now with no adverse results).
Waiting for paint to dry is EASY
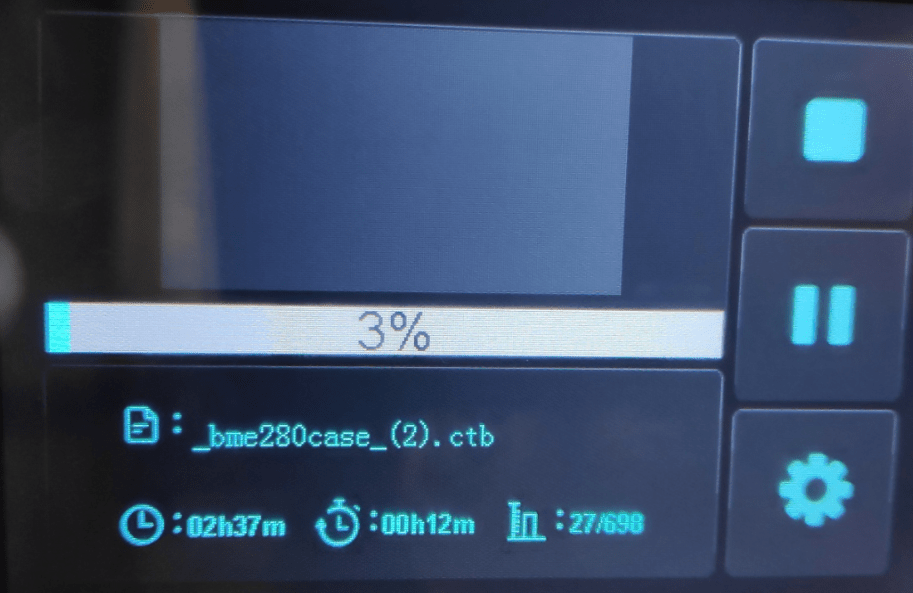
I pressed the PRINT button and immediately the printer sprang to life – only to tell me I had a mere 2hrs 37 mins to wait for the result.
These printers are not at all expensive and include all manner of bits and pieces (see below) to go with them – rather than go into all the specs here I’m simply going refer you to a full list in the top link in this page. As this tiny BME280 housing was my first 3D RESIN LCD printing job, I spent half of the afternoon losing the will to live, waiting for my first tiny enclosure to be ready.
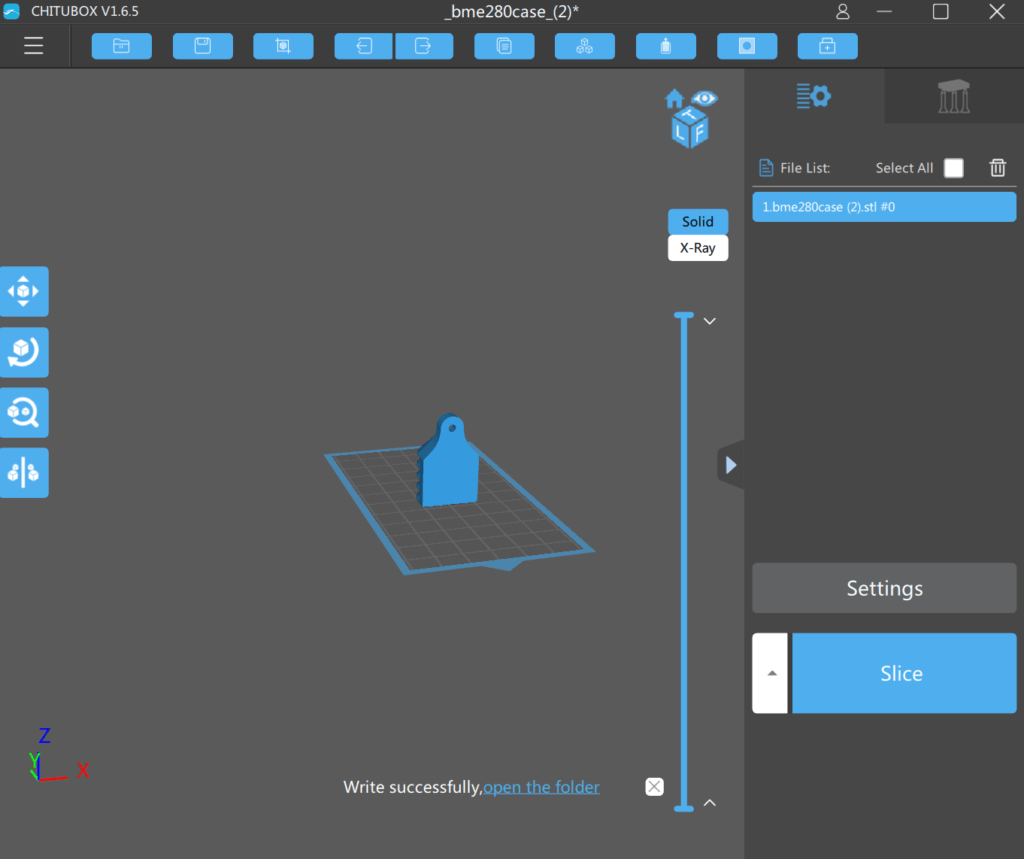
By the time I got to my second model it all became obvious – but the suspense the first time around nearly killed me. Anyway in the Chitubox PC program above, all I did was OPEN a new project – ADD a file, SLICE (press a button) and SAVE to the USB stick which I then inserted into the printer.

Thankfully it was all worth the wait as, after 2 hours and 37 minutes, my simple job sat there waiting to be pulled off the base.

As you might well imagine, after the initial rush, it turned out that this first attempt at a louvred housing was not QUITE perfect – as I lost a tiny edge at the rear right in the picture when removing (with a supplied blade) the model from the base – but all-in-all, with NO supports or post-treatment, I was very happy with the result.
Over on the lower left of the above image is a countersunk mounting hole. I went back to my friend who modified the off-the-shelf artwork and the MK II design ended up with two mounting holes and was thickened at the end to ensure no further issues getting it off the plate.
The printer comes complete with spare release film, gloves and masks, brushes, a screwdriver and Allen keys… Oh – safety – use the gloves and wear glasses (I have varifocal lenses and they are never off unless I’m sleeping – safety glasses would be better) – the resin is apparently toxic until it is UV-hardened – I’m still here despite not realising that – and also at first not using the gloves – but different folk have different reactions to this stuff and also to the isopropyl alcohol I used to clean up. In Europe the latter is widely avalable and cheap (6 Euros a litre at a local store here in sunny Spain).
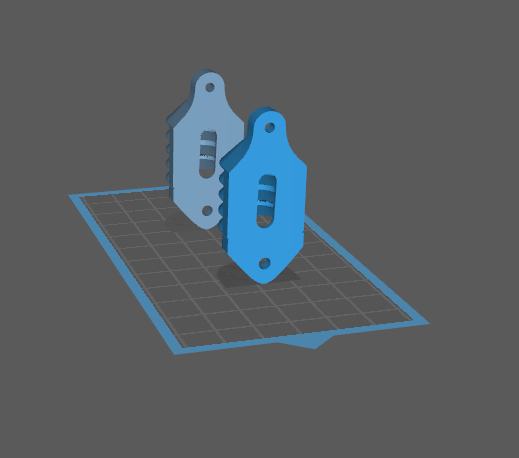
My friend Aidan who has far more 3D printing experience than myself, updated the artwork and I printing out a pair of the “improved model” BME280 case using Chitubox to copy – paste – exciting!! BUT the print time was around 3:46hrs due to the increased height of the modified design. Should have flattened it in Chitubox but at the time I didn’t realise I could do that.
Thanks to Banggood, Aidan and patience… wheeeee.
And here we go.. As Dr Zzs says – I was now part of the club 🙂


Next – some prints for the relatives and a skull for me… This is getting too easy… So THEN having realised I was using LOTS of resin for these models – I went off looking at Autodesk MeshMixer to figure out how to hollow out the solid items – only then to realise that this is built into Chitubox. I have to say, watching the hollowing process is FASCINATING.
Oh and yes, one of my Easter Island men now has a LED-illuminated wooden base I borrowed from elsewhere – I now have my lovely VIGOTEC VG-L7X laser engraver and will make my own bases once I find some decent wood:-)
Dawn of a new skill
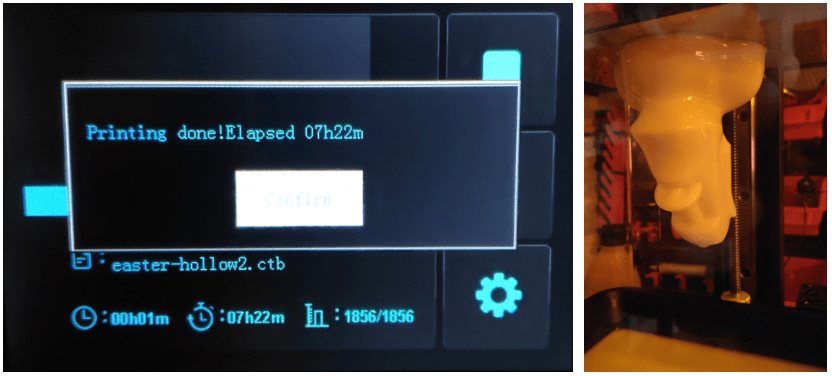
I inserted the original Easter Island guy – with one button press – hollowed it him out to a reasonable 1.5mm thick and tried again – that saved LOADS of resin AND it meant I could light him up from underneath. 7+ hours processing to make my first, large, hollow Easter Island man. See below then head back to the top to see my current collection. The new hollow guy is bigger than any of the other models I’ve done.

More Models
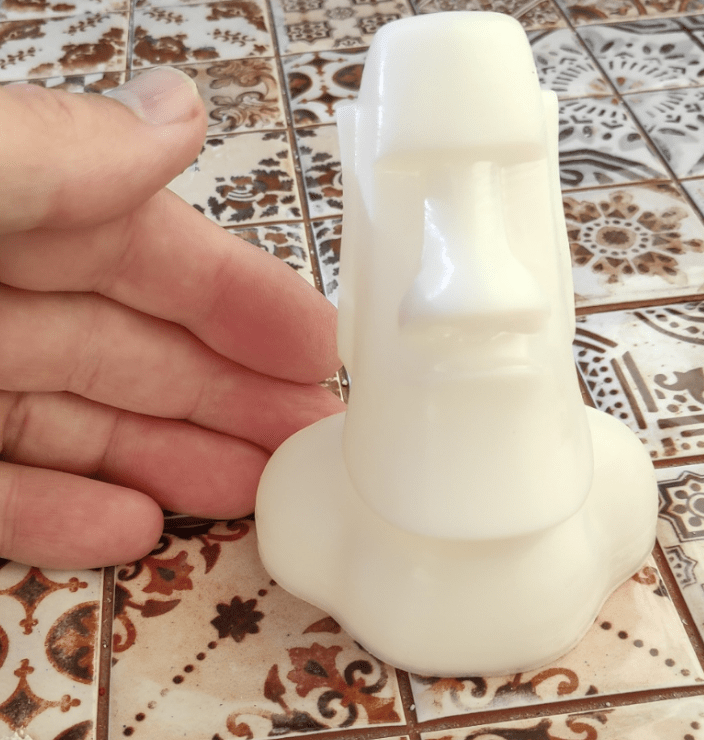
Ikea (at least on the coast in Spain) have some inexpensive glass containers with decent wooden base. I recently bought one to house my larger Easter Island Moai bust and also bought various colours of matt acrylic paint at the Chinese stores at the coast.

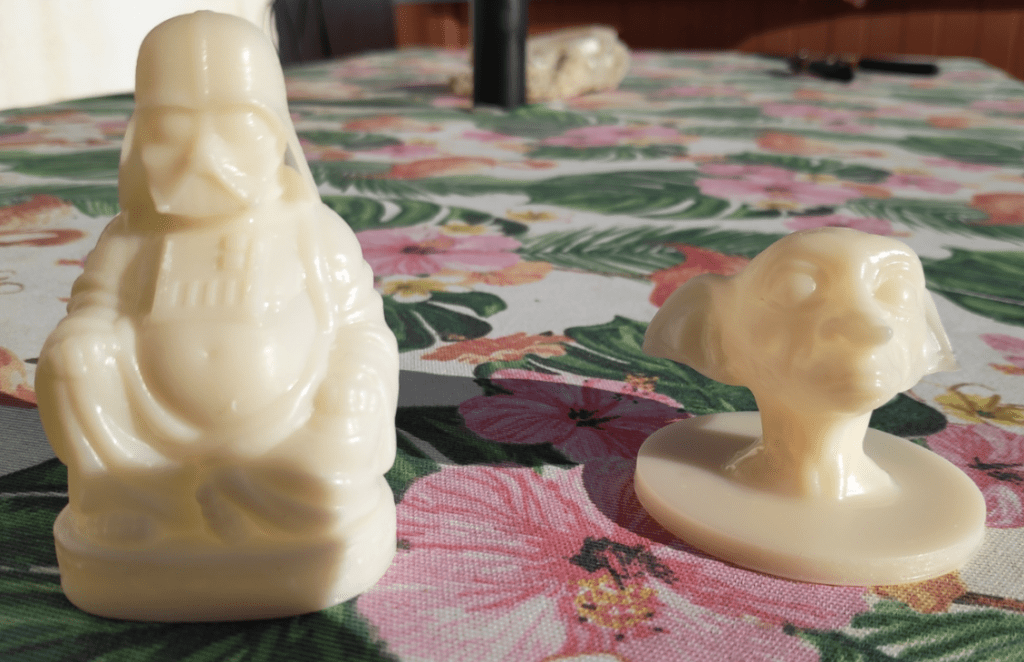
For my next trick I made a “Darth Buddha” for myself and a Dobbie’s head for one of my neighbours. The white “Easter Island Moai” above and three photos down is my largest and first hollowed out result – I printed the Minion and Yoda (further down the page) on the same day – a job which took 5 hours overnight. The large white hollow model took 7+ hours (no effort involved – I just left the printer to get on with it).
By October 23, 2020 I had the first of my coloured resins – clear red. I ordered this Longer3d.com product on October 4, 2020 from AliExpress and it arrived less than 3 weeks later – sadly another bottle of resin from AliExpress never made it here to Spain but on December 16, 2020 I had also ordered some Elegoo water-washable clear blue resin from Amazon.es and that was delivered two days later at €22 for 500ml.
While I’m here, Banggood also sent a . Just be sure not to look at the actual light – at least not without protective UV glasses as UV light is deceptively dangerous (obviously you can’t see the UV bit)… and why would you need one of these? Well, the models come out of the printer, functional but with a slight slimy feel.
You can daylight-cure models of course – which is what I did originally – but then this WAS in the HOT Spanish sun and it took what seemed like hours for the models to lose any sense of stickiness. Now that winter is here, there won’t be so much of that sun-curing – indeed in parts of the UK, the sun has probably given up for the year.
These handy LED-based 6W UV (effective equivalent power 60w) lights, properly used can speed up the curing process by some way (realistically drying small models in a few minutes) – I just need to make a support stand for the lamp – no doubt using the 3D printer – but that means learning how to create – rather than just use, .STL files. If you look at my review of the Crealty LD-002H printer, you’ll see that the UV light can be quite valuable.

And now, back to the models…

I picked my first resin at random – looks like I made a good choice – 500ml of Shenzhen Weistek Standard Photopolymer Resin (creamy white). Endless models are (mostly freely) available on Thingiverse, All3DP, Free3D, Zortrax and elsewhere. And I thought the PROGRAMMING resources out there in the cloud were great – I had no idea there was such great ARTWORK as well.
Below: after coating with best Spanish Chinese-store €1.80-a-can spray paint… (now I have matt varnish but at the time I didn’t)… all of this is thanks to the from Banggood – no I’m not on commission nor do I do affiliate schemes. They did provide the printer for evaluation – I paid for all the materials, cleaners, resins etc.

Now, here’s a point: up to now I’d mainly used the one resin and had NO problems at all – however as I learn more about the subject I’m reading that exposure time per layer is important. On the LD-002R, I am still running with all settings at default (and assuming the plate was properly aligned by the manufacturer) – that is – in Chitubox under “settings – print – exposure time” I used the default 6 seconds (indeed I used defaults for all settings).
I’m now just about out of the original Weistek resin – it seems out of stock everywhere.
Instead, I’m now using the above-mentioned clear “Longer” RED resin. I wondered if the same exposure settings would work for another resin and after some disasters with my Anycubic printer, I’m wondering about the potential issue of models falling off the metal plate early in the process and hence failing. Having said that, while I’ve had nothing but failure after failure on my Anycubic, pretty much everything I’ve tried on the Crealty has and continues to work. With the success of both that original Weistek and now the “Longer” clear red resin, I’m looking forward to trying more variations.
I’ve just received some clear blue resin via Amazon to try next and now I’m aware of the importance of correct exposure (the value of which may vary with humidity, resin manufacturer and age of the resin to name just a few examples) I’ll be making a couple of tiny models at first with the new resin. This fellow explains the potential issues well and reminds us of a useful test.
FEP Sheets
The obvious questions at this point would be – what’s a FEP sheet and why should I care? Well, once you’ve had your printer for a while (as I’ve just discovered) ytou will likely find a way to poke a hole or otherwise disfigure the thin clear plastic sheet that sits between your expensive 3D printer screen (the ultraviolet light screen that does the conversion of image into solidified resin – thin layer by layer – into solidified resin) and the liquid resin itself.
Not something I gave a second’s thought to until I’d just finished making a model and noted a TINY amount of resin on the actual glass base screen. Out with the isopropyl alcohol (in the USA they’ll have a fancy name for it) and kitchen roll and I carefully removed all traces of resin from the glass.
Having completely removed my innocence, the next thing to do was to remove the clear FEP film from it’s metal frame and replace it with… what? Turns out that Crealty included a single spare sheet of FEP with utterly inadequate instructions as to what to do with it. No mention that the new sheet is flat, not formed around the metal frame and hence has to be forced in place with hand pressure, no mention that it will need trimming or that it initially comes with protective film on both sides.

Filled with fear, I started the process of removing the 14 bolts that hold the film in place on it’s metal frame – and then removed the old film itself. How on earth was I going to replace it.
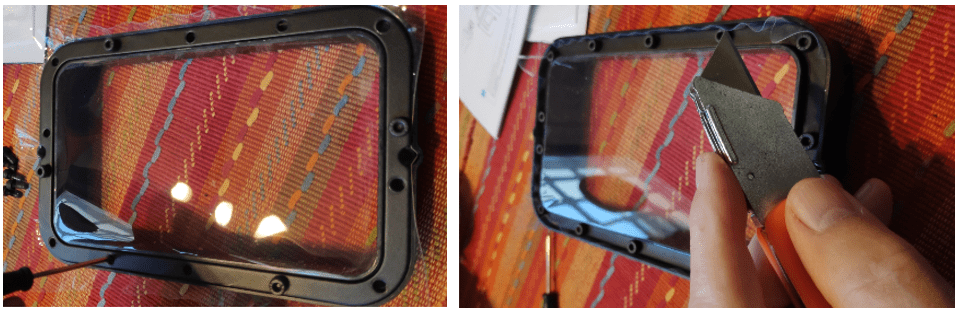
My starting point was a clean, cat-hair-and-dust-free table. I placed the new sheet as evenly as I could on the main metal plate (middle photo above), convinced that when I pressed it in with the acompanying metal bracket, I’d split the film before ever getting it into position, tightly. Well, that didn’t happen – I started assembling, pushing the metal pieces together as evenly as I could (not trivial – right photo above) and when I had them as tight as I could get by hand with this new sheet sandwitched in-between, I started to poke into the holes for the bolts, carefully poling through the FEP (left photo, below) – I did them one at at time, picking opposites until I had all the bolts loosely fitted. I then started round two, tightening them up as evenly as possible. All along I was making sure the film was flat and tensioned evenly.
The result, perfect – but not before some serious concerns that I might be in over my head. And now, I have NO spare film for the next time I mess up. Thankfully, on request, Banggood quickly dispatched a couple of spares sheets for me – I’ll have them in a week or so – I’m fairly confident I won’t break the FEP sheet in the meantime but this brought home to me the need to have spares.
The sheets are dirt cheap and various people supply them, not just Crealty. The last thing to do was to TRIM the sheet as it was sticking over the edges of the metal frame, all deformed as you might expect. A sharp razor blade took care of that (right photo, above). Messy but do-able. This job LOOKED a lot harder than it turned out to be. In a matter of, what, 15 minutes I was all done and I popped the assembly back into the printer, ready to go.
December 2020 Update – The Lychee Slicer 3 Software

Above is the computer rendering of a demo model called “Poissin” about to be sliced and hollowed with Lychee Slicer 3 software.

Though I now have a licence, I started using the free version of Slicer 3 for Windows 10 PC which then generates the relevant file(s) for any given printer) – after a first attempt (my own fault) where I ran out of resin due to not making the model hollow, I’ve just finished a 7-hour print run on my Crealty printer (nobody said 3D Resin printers were fast) and feeling highly optimistic.
And here is Poissin in the flesh – created in “Longer” clear red resin. Anyone for clear blue?

And above is my copy of Lychee Slicer. I bring to your attention the fact that at top centre I am on the “supports” menu”. And on the left, third from the bottom is the “Hollow” menu. Trivial point? NO. There are YouTube videos out there which will drive the budding 3D enthusiast MAD as “HOLLOW” is a very important option and USED to be under the top “preview” menu in Lychee Slicer. Not any more.
My lovely “Poissin” above is possible thanks to those helpful souls who pointed dout that the menu structure of Lychee Slicer has recently changed.
Pete, why did you buy Lychee Slicer 3? I don’t see many ChituBox complaints.
Hi Kris – I didn’t – they gave me a licence. I wanted to check the difference between the free and commercial vresion – and I agree, nothing wrong with Chitubox. Not checked yet to see if Chitubox generates files for AnyCubic – but as that printer obviously has some issues I guess that’s not too important. I’m dyiong to try out my new clear blue resin but waiting for a warmer day so I can open the window for the hours that prints take – same with the engraver 🙂
I see. Thank you for the clarification. And good luck with the blue resin.
Hi Pete
I have one of those UV lamps. It doesn’t work as well as I’d hoped but seems better than nothing. I suspect the wavelength isn’t quite right.
This is how I use mine:
I spray painted a plastic bucket (inside) with silver paint & attached the lamp to the base of the bucket (inside) and use it as a hood over the printed object.
I also use a ‘solar turntable’ to rotate the object under the lamp. I’d thought this was my own brainwave but it seems to be quite common!! These things are super cheap from China – you might see them in jewellers windows etc.
I’ve bought a pile of UV LEDs thinking I might make a curing lamp at the correct wavelength but this can wait. When a model takes hours to print it seems trite to worry about curing time.
Hi Ian – I agree with what you say – claims of curing in a minute or two are clearly overstated – but as I hate getting sticky resin on my hands I’m perpared to leave my models which take many hours to print, under the lamp for 15 mins just to get a tack-free result – in the winter when the sun is little more than a memory, this seems to make good sense.
I have the same printer. My tip is to use cellulose thinners to wash finished parts. Works much better than IPA & is much cheaper too. It stinks a bit…
Trust me – Isopropyl alcohol stinks a bit too. Thinners – any good for cleaning off the base etc?
Hi
Do you about the drain extension for the plate? (something like thing:4549440). The idea is that the angle helps it droop quicker. When its done printing.
Do you know of the exposure matrix https://youtu.be/r9GwPEJ8Lq8
https://tinyurl.com/yxaht2rj
I also have the Creality LD and it works great after I used both of them.
Hi Michael
No I was not aware of the drain extension – thanks to you I am now. Also the exposure matrix – I’ve now updated the blog accordingly – very useful. Though I had no problems, ny next bottle of resin will not be from the same manufacturer as everyone is out of stock. I’ll follow the rest of this up shortly. Also just updated as I have my new UV curing light. I need some decent UV glasses.
Thank you.
Pete
Great review which animates me to buy a Creality printer. =)
Is there TPU photo-resin or some sort of “flexible” photo-resin available?
There is, but it’s very expensive even when compared to other resins (2-3x).
I’m using the Weitek resin – £20 or so for 500ml. Amazon just ran out of stock.
Yep, basic resins are more expensive than FDM filament but are reasonably affordable nowadays. The specialty resins like flexibles, however, are still very expensive.
That also means a lot more sticking to the plate. Vertically they come off dead easily – I could have made a dozen. About the only thing I need to crack is how not to get solid resin on the back of the plate – took some scrubbing. I’d not realised how quickly daylight sets the resin off…. I should know better from my photography days.. still, I know now. Thanks for the modified artwork. Not entirely sure why the hole in the back centre…
simple supports in the base to raise it off the bed a mm or 2 should fix that, or a raft that is thin and easy to remove
A way to get faster and better results is to lay flat a model like the BME280 sensor case.
I can see a bit of distortion in your 3D print which probably would be reduced by laying it flat. My Robox wouldn’t be able to print out that model without a huge amount of support material which shows an advantage for the resin printer system.
oh, I have an original one of those robox printers, just pray you dont clog the head, it is an expensive replacement, no repairs out of warranty at an affordable cost