Hard to believe the amount of time I’ve spent on this thermostat and the backup unit. I’m still too deeply buried in R&D right now to fully develop another full article but here is some information to add to the previous blog entry on the subject. My Node-Red/ESP-GO thermostat is now in operation with two stat units, originally to handle any issues whereby one locks up occasionally, but with recent improvements that simply does not happen.
The 2.5w laser engraver turned out to be less of a blessing than it first seemed, thanks to it’s inability to handle clear Perspex (does a lovely job on coloured material) I initially had to go back to traditional DIY techniques for this project but see the update at the very end.
Some visuals – here is my Grafana logging – accessible externally thanks to PiVPN as is the stat itself.

Above is my Grafana info screen – monitoring and logging the two stats (main and aux which have now survived power cycling both for the stats and Node-Red without failure or needing intervention). I’m also monitoring (temperature in the hot water tank cupboard from the mains controller supplying on-off instructions to the air—source heating system.
The main (green) sensor is currently at 22c (air source takes ages to reach full set temperature) and that is the sensor in use (aux in yellow is a fall-back). Humidity is for reference only – ultimately I’ll factor that into the heat supply as it generally FEELS a little warmer when the air is dry.
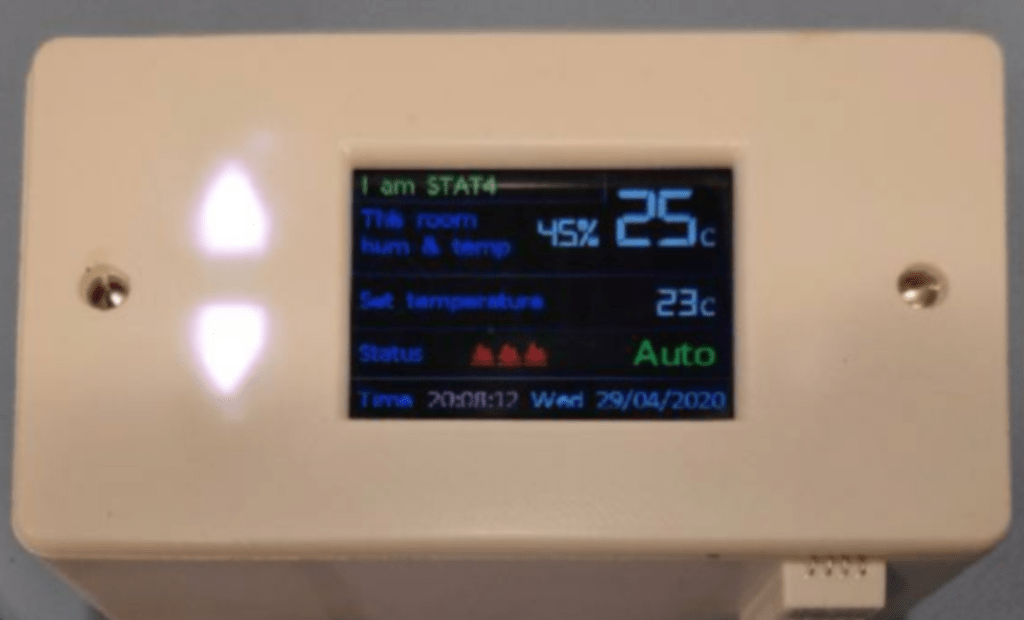
Here below is the stat as it appears online (only via PIVPN, deliberately). The TOP green readout is high resolution but I’m only actually using integer resolution – why bother being SO accurate when the difference in temperatures is well over 1 degree from 1 metre above ground to 1.5m and from one side of the room to the other. There IS however a use for the more accurate reading, as turning the heat off when the stat reaches set temperature means it will only ever stay AT the set temperature for a few moments.

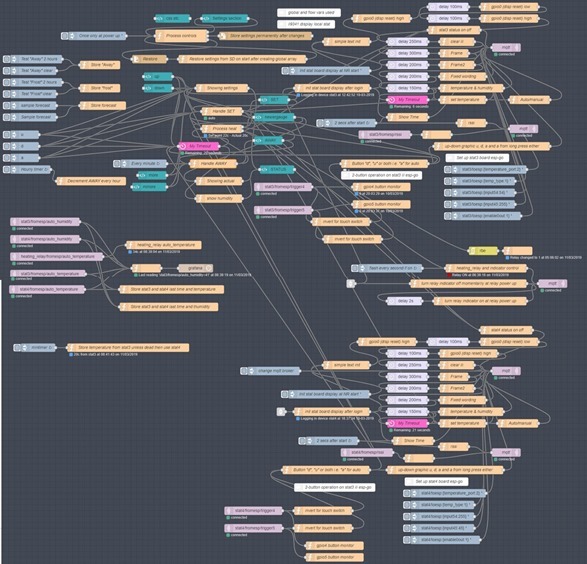
And yes, the temperature does need to rise quite early in the morning – on really cold mornings there is a lot of lag with air source heating before radiators get up to full temperature. As you can see, the Nod-Red flow is getting way too big for one screen. Most likely now unreadable even on expanding but hopefully it will give you some idea.

These stats are deliberately simplified allowing limited up-down temporary temperature change and monitoring of local temperature and humidity as well as SET temperature monitoring and heating status with WIFI signal RSSI thrown in for good measure.
The actual physical stats are starting to look ok, would be better if I had a decent engraver. Below, stat4 on test minus it’s up-down buttons on my bench, working on USB and with it’s plastic screen protector still in place. Stat3 is boxed, running on its own internal mains power supply and in the house, getting the spouse-test. 2 days without issues.

And here is one of the first “boxed” units… in my office which is always warmer than the house and therefore the worst place to test stats… this one now has buttons that light up when pressed. I just wish the buttons had an overhang.

April 2020 – I’ve just been putting the finishing touches on a new touch-switch version of the stat, still using ESP-GO. I had planned to do this with Tasmota but it seems that the ILI9341 installation in Tasmota isn’t ideal for the job. The ESP-GO implementation on the other hand is ideal for this application.


Hi Peter,
thank you for sharing your code.
Thanks to it, I realized a red-node widget that allows you to control the climate element of the Home Assistant, expanding its functionality.
https://github.com/giuseppeg88/node-red-contrib-thermostat-scheduler
Looks like that leans heavily on my original but takes it further. I’ve taken a look and of course grabbed mytimeout.
Oh dear… assumptions – 3 unknowns when trying to deploy the flow….
Imported unrecognised types:
api-call-service
server-state-changed
server
Imported:
Any ideas?
Pete
That video made me smile, he is certainly a creative fellow! His Dremel cut illustrates what I was saying. I was trying to suggest ways to get a nice straight cut with square sides, something that a display might fit into.
I’ll have to look at more of his videos.
as you said, do what you can with a drill or dremel, then go with a file to refine edges… in case of displays or other devices with a flat panel larger than the part which goes inside the box, even not perfect borders are ok as the face panel will cover them…
he transforms tubes and metal sheets into drones, bikes, motorcycles, dune buggies… it all seems so easy how it does, but sure he plans everything, and it’s impressive the results with basic tools and materials he gets, nonetheless…
i like a lot the first minutes of his videos, when he collects materials: he has shelves of wheels, shelves of accelerators, shelves of fuel motors, shelves of brushless motors, shelves of tubes, shelves of whatever thing you can imagine… he has shelves of everything, even shelves of shelves! 😀
Peter, what’s your technique for cutting the plastic in hobby boxes? I tried dremel and hot knife, but I never could seem to get clean edges.
Jason, you will not get clean edges with either of those techniques, the problem is that local friction cases the plastic to melt. I have had most success with a medium tooth jigsaw blade run on slow speed and then finish with a file. Some plastics like perspex or polycarbonate can have their edges polished with something like T-cut or flame polished.
Another alternative is, if you have a hand held router, is to use the guide bush and make a template. Then use a single or two flute cutter. That depends on how many you want to make.
If you happen to have one a CNC router would do the job.
look at 5:50 how this guy does… https://www.youtube.com/watch?v=TxE4MRTLDCs
p.s.: his channel is impressive, he has A LOT of good practice in many fields, a pure genius…
I am trying to find the Espressif NONOS SDK 3.1. Do you have a link to this? In due time I want to try to get ST7735 also functioning on your ESP-GO-3 locally by cloning it.
I suspect you are using this https://github.com/espressif/ESP8266_NONOS_SDK as this is the latest version in the master branch.
It dies on an undefined reference to ‘user_pre_init’ from 2 places. You must have stumbled on that too with this version of the SDK.
I’ve not yet had success with the ST7735 – by all means but if something doesn’t work after altering the code you may be on your own. The nonos sdk 3.1 is on GIT… somewhere.
Great news as usually.
I just wonder why Grafana? Why not Node-Red?
The Graphing capabilities / flexibility of Grafana far exceed anything I have ever seen the Node-RED GUI can do. I am actually running similar data into both at the moment and the Grafana package allows far greater control of the visual aspects. It all depends how much information you want to display / derive from the graphs.
for smaller needs, chronograf, part of the influxdb suite, is very powerful, too
https://www.youtube.com/watch?v=57VgjtjDTU8
Thanks for that, very easy to interface with InfluxDB (Obviously 🙂 )