Regular readers will know I’ve had MANY WiFi cameras in here but never TP-Link so this is a first. For clarity I should say I’m currently in the UK.
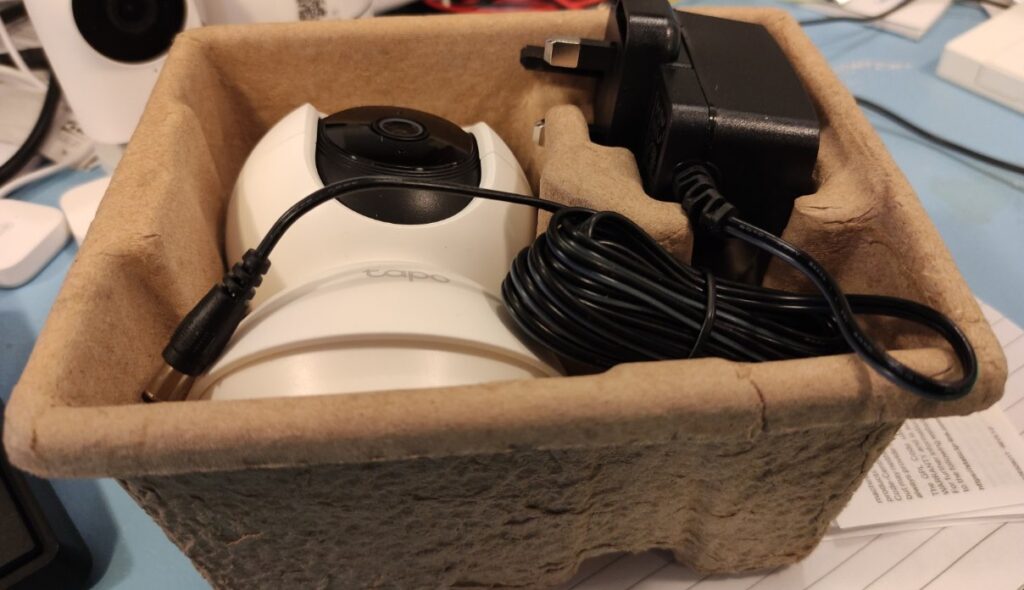
The very first thing that struck me during box opening was the almost complete lack of throw away plastic. The camera arrived in a cardboard box filled with egg-box-type material for packing. That’s refreshing. Headline figures: 360 degrees horizontal, 114 degrees vertical pan and tilt. 1080p. 2-way audio, night vision, 2.4Ghz WiFi.
In the box – the white camera, UK-plug power supply (plug-in-the-wall) with what seems like 3m of nice, thin cable, the usual multi-language guff I’ve yet to read on any camera, small English-only Quick Start Guide with mounting and APP instructions (nice to see an obvious APP name “TAPO”). Oh and a small, flat white mounting base + screws and anchors, finally a paper mounting guide. Even my new Amazon AWS Polly (Emma) likes the new camera 🙂
There’s a clear indication of what the LEDs on the camera should do and when – that’s a good start. There’s a tiny socket on the lower back of the camera (not USB) and what looks like speaker holes on the back.
Enough waffle -time to turn it on. Red LED on solid, vague indication of 4 IR lights which stopped after a few seconds at which point the camera started to pan and tilt for calibration – that took a few seconds. Now we had flashing red and green.
I went off to get the TP-Link Tapo APP from the Google Playstore for my Poco X3 NFC phone. The lights continued to alternate red/green as instructed in the provided sheet.
Up to now good – installing APP took seconds – registering with email and password took seconds, done. An email arrived in a couple of seconds to confirm the account – done.
At this point I logged into the new account on the phone. “Tap + to add your devices” – so far so good – the camera was still sitting alternating red and green. “Tapo C200” – “Next”. “Turn on location” – “Next”.
I was then asked to connect to a temporary WiFi – “Tapo_Cam_25B1” – “Connect”. I did that and a list of my available access points popped up – I was invited to select one and enter its password.
A voice – clear English male – said “Connecting to WiFi” – then “WiFi connected”. Finally the App allowed me to rename the camera- I did – to “c200”. I was then invited to select a location (office, bedroom etc). I did that. The APP said “Sounds Good”.
I noted an info block about using a microSD if I wanted – and if so NOT to format it on a PC or third party APP. I left that for now. I was then given the option of using Amazon Alexa or Google Assistant. I entered the “Maybe later” option.
At this point the TAPO home screen appeared with my camera top left – and I noted a short-lived “movement detected” notice. See image.
Options onscreen included the usual – “talk”, “pan & tilt”, “voice call”, “privacy mode”, “Tapo Care”.
You can set how many degrees each touch of pan or tilt does. That’s nice.
With optional “Cloud Storage” you can store up to 30 days of movement, AI detection – but then I checked – person detection and baby crying detection NEEDS the cloud upgrade -that’s not very smart, many of us will be happy using SD memory. I do that with my Imou Ranger camera and though it prompts to get a cloud account occasionaly, never insists on it for any feaures.
By default the camera image shows time and date in the top left.
There’s a privacy mask – but again why do you need to upgrade to get that? But then under “motion detection” you can set up activity zones without the cloud.
Motion tracking, thankfully does not need any upgrade. There are options for visual and/or light alarms when motion is detected. The audio wasn’t that loud but at least it won’t scare any babies,.
You can invert the image if needed…
Under ADVANCED there is distortion correction, I like that. On-screen display settings – including time stamp on/off and display text options. No quotes etc. in the text and no ability to reposition text or timestamp. My Imou has this limitation too – I’d prefer to be able to move these around.
Record audio on/off, powerline frequency control including auto, diagnostics on/off, pan and tilt correction.
Video quality defaults to 720p with options for 360p and 1080p – I selected 1080p. All-in, not bad.
Now to insert an SD card for recording movement – my Imou camera does this well and I find that indispensible. I inserted an old Sandisk 16GB microSD I had lying around and hit the format button. Less than a minute later – “Format successfully”. I left the default “loop formatting” on. The card has had some use in an RPi and so the screen said “14G available”. I figured now was a good time to go get coffee so the camera could see movement over an extended time – I wanted to see how easy it was to check for recorded movement. On some cameras it’s a pain. On the Tapo it’s fine.
In common with a LOT of other inexpensive cameras, during movement despite the 1080p claim, some compression artifacts appeared – I wish they’d make that a user control option – and note the slight ceiling light glare: the camera lens and my phone screen were spotless at the time. Update: The “glare” was in fact a slight film of maybe finger grease on the lens – no idea how that got there – gone now – clear picture. See above and note lack of light glare.
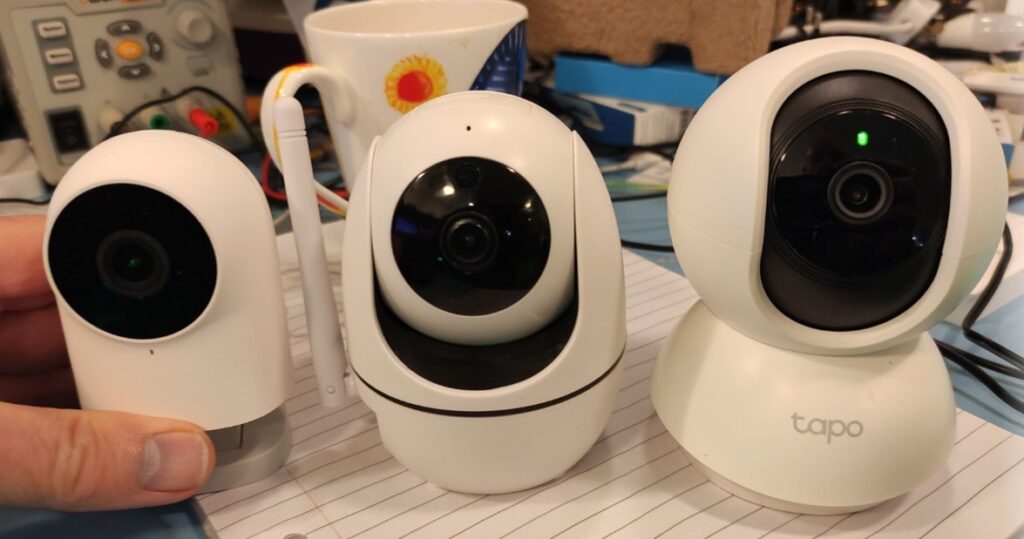
Size comparison – hand, coffee cup, my Aqara Camera/Hub on the left (not pan and tilt), recent Escam (pan and tilt) camera and Tapo C200 (pan and tilt) camera (extreme right).
As for pricing – not at all bad (depending where you live) – Amazon stock it as do TP-Link themselves and lots of other vendors.
Over time I’ll check sound quality and night vision and report back.
Meanwhile, my thanks to subscriber ODDBOD who looked in to tell me that the camera is ONVIF-compatible – and pointed me to the FAQ that tells you how. I’d tried ONVIFER on my phone but initially it would not work. As stated in the FAQ above, you have to give the camera an account name and password that it will accept for ONVIF requests.
So once that info is entered you can control and view the camera with ONVIFER and similar including pan and tilt, digital zoom (which is better than I was expecting). Audio doesn’t seem supported in ONVIF but it is entirely possible I missed something.
Overall – I’m keeping it. GOOD.


Hello. I just bought Tapo C200 yesterday. Used it the same day for testing and it was working very well. Since I am leaving from the country that I bought the camera and connected it to the wifi that I am currently using, will the camera still work once I shipped it to other country for my family to use? And since it will be shipped away from here, will it be able to connect on my phone but the wifi on the camera will be diffent from the one that i am currently using?? Thank you.
Tapo c200 purchased about 2 years ago and no problems until now. Cannot link with wireless and red lights are steady. Camera seems slightly warm. I have reset, unplugged, reset router, removed and downloaded app again several times. No joy. Issues started when camera updated last. Anyone have same problems? Should I used it as a fishing weight and buy new?
Its that long since I used it – and TP-link didn’t seem to want to send stuff to Spain so I moved on… if it’s getting warm, I’m thinkint it’s like my last router which ended up geetting too high a voltage – bin…Cameras – outside I’m using with great success cameras from Imou – and a Sonoff CAM SLIM which works a treat with their NSPanel Pro (not everything does – but this does – and I think Alexa… but hey – if you’re planning on buying a new camera – just bear in mind it’s Chinese New Year until the end of the month – expect a raft of new announcements bout then… be patient if you can 🙂
It works well in a large birdbox, but beware of accidentally enabling the alarm function (which I can no longer find on my app – maybe they have upgraded the s/w since last spring). We pressed the wrong button, and every time the birds entered the box a loud alarm went off and the birds understandably flew off!
it’s still going strong without any interference from me since about this time last year. Good thing too as the birdbox is high up and hard to get to.
That;s handy to know – I was thinking of getting a birdbox to put mine in.
Got one of these coming today, will link it up to my Hikvision NVR and use for internal monitoring of the house while I’m away.
Good luck – I hope it works well for you.
After reading your review I bought a couple from Am***n.
I thought they would make a Christmas holiday project, but after a couple of hours I realised they just WORK. Image quality is great and they seem to have integrated well with motioneyeos in Home Assistant. I’m used to things being difficult, awkward sub menues and config files (maybe its just me)
But these just worked.
Hi Tony
That’s exactly how I’m finding the C200. I need to get it on longer-term test but that’ll have to wait until I’m back to Spain. Up to now, my only comments are that I’d really like to be able to reposition that text and/or remove it.
The Tapo is by no means alone in being a little inflexible with overlay positioning and it’s a minor point. Only a long term test will tell me if it can handle external use under the eaves (they don’t claim external use, of course).
In general I’m finding it to be a nice camera – size-wise it is one of the larger internal cameras, not sure if that’s a good or bad thing. Enjoy.
This may help: https://www.tapo.com/uk/faq/70/
Basically it needs enabling from the app!
You are of course right – I’m updating the blog – ONVIF-compatible including pan and tilt – that’s a definite plus.
Surprised you didn’t mention the Tapo family’s secret weapon. They support ONVIF.
Well, now you bring it to my attention… ok I just tried Onvifer on my Android phone – no joy. Any thoughts?
Anyone tried the KASA version…..my sockets and lights are all on KASA so am interested in any comments.
Also which do you guys prefer and why? KASA or TAPO
Hi there,
I use KASA, because KASA was the first “stuff” I bought, no technical reason or logic.
I don’t even know what the differences are 🙂