I’ve never had an NVR before so this is a novelty with a rather nice feature – the wireless cameras MESH which means I can have the NVR in my house-end office and the last camera at the very far end of the building even where I have no WiFi access points. The full title on Banggood’s website for this 4-camera+NVR kit is GUUDGO 4CH 2.0MP 1080P Wireless Surveillance White Camera System Kits outdoor/Indoor Weatherproof P2P CCTV Monitoring Kit
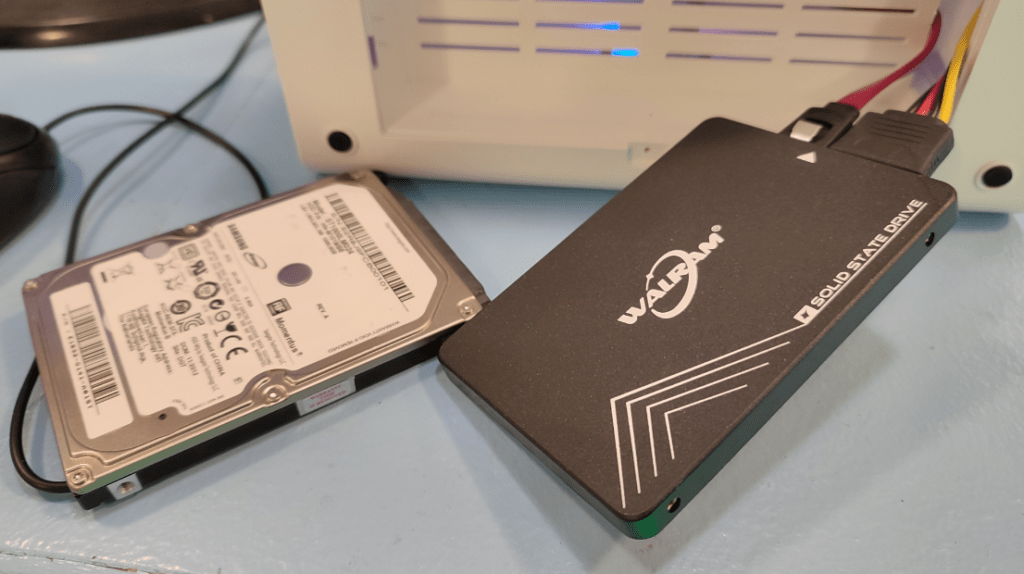
Mine came with an EU plug and separate UK adaptor on the NVR, whereas the four cameras (power supplies) are EU plugs and no adaptors – most likely an oversight. Im including in here, reference to a Walram SSD which I’m using in the NVR but which later will find use in one of my PCs.
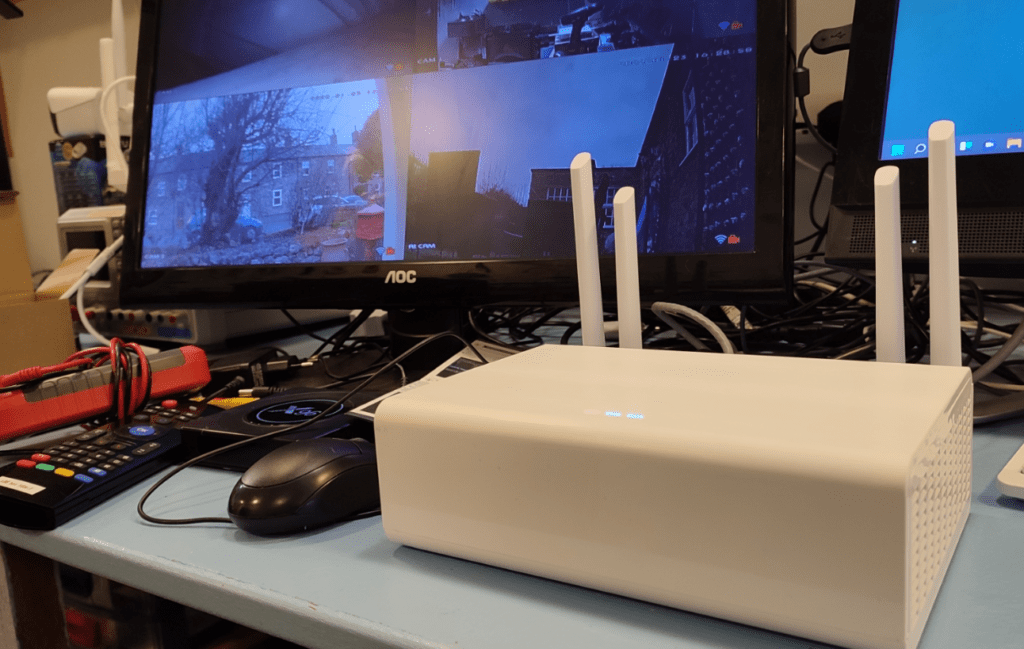
Initial opening impression, the white cameras look nice, the box is small and neat looking. I opened the NVR because I noted that depending on what you order, it may or may not contain a hard disk. 3 small screws took seconds to remove using the supplied screwdriver at which point I came to the conclusion – no hard drive in there. Underneath I could see a space large enough to fit a full size hard drive but looking at the instructions, there was mention of lining up the mounting holes in the drive with the relevant positions in the case. My case has neither bolts nor holes anywhere other than rectangular ventilation holes. See photo below:
So, I thought I might check if they meant further inside? As you can see in the photo above there are 4 black rubber bumpers on the bottom. It is I think reasonable to expect that peeling those off would reveal screwheads underneath – mistake – I tried to peel one off and the rubber foot sunk into the base. Oh, well, maybe the instructions are just a little out of date as well as being language-challenged. With a handy pin I reset the black foot into position.
I plugged the power supply into the mains and into the NVR itself, plugged in my spare PC monitor using an HDMI lead (not supplied) and immediately a message ‘WIFI NVR’ appeared followed by ‘Whether DHCP effect immediately?’ then “No available space for recording!”. At this point I realised I needed to plug in the supplied USB mouse! Now I could set the time zone. I should get a job as a translator.
The next message was ‘Remind you current “Admin” password is a Big Security Risk, whether to set a new password?’. I was given the opportunity to set a new admin password with a small pop-up on-screen keyboard. I did set a new password. I was then given options for two security questions with answers. I picked date of birth and the example given was ‘Jun 1977’ – sadly when I tried putting in my DOB, when it came to entering the space, the response was ‘No special characters allowed’ – clearly not entirely thought through. Anyway, so now the NVR was to send me a verification to my contact profile email – not sure how it planned to do that as I’d not connected an RJ45 and not given it access to my WiFi access point.
The unit now realised it had no access to the Internet. It was expecting a hardwired connection so I thought – why not – and plugged in an RJ45 lead. I hit ‘retry’ and all was well. Now I was cooking – the unit realised that none of the four cameras were connected.
I plugged in a camera into its’ own power supply (12vDC) – this too had an EU plug but thankfully I’ve lots of adaptors lying around. I was thoroughly expecting at this point to have to either plug the camera into RJ45 OR enter the name of one of my access points. Wrong. As you’ll see in the photo below however, the camera simply came online without any of that – hooked into some network about which I didn’t at first follow with an IP address of 172.25.123.xxx. (details removed to protect the innocent – i.e. me).

So now I was asked if, to half storage, did I want to switch to H.264+/H.265/H.265+ – I hit OK and nothing seemed to happen except the menu went away and I was left with my one camera on view. I double-clicked the camera view and it expanded to full screen. At this point I realised I was looking at something like 10 seconds lag (but read on). At the bottom left of the image I noted the text ‘AI CAM’
I right-clicked the mouse and a host of features appeared – clearly this NVR is set to work with a number of different camera types as I noted PTZ control settings – and there are no PTZ controls on these cameras. But then I wasn’t expecting any.
That first camera seemed to have no antenna which seemed odd – and sure enough, I checked the other three containers and they all had their own antenna. I checked VERY carefully as I’d not put the packaging in the bin at this point. I’m missing one antenna. I borrowed an extra-long antenna from a defunct TP-link WiFi router (thank heavens for standards).
So now, I had a working system – I needed to hunt down a spare hard drive. If I was thinking long term I might be thinking about SSD to minimise power consumption but I just happen to have some 2.5″ and 3.5″ 1TB drives from PCs that have been upgraded to SSD, useful for testing.
My PC would not let me format the 2.5″ disk as Fat32 (and that’s as stated in the NVR manual) so I formatted it as EX-FAT – as it turns out I didn’t need to bother. I turned off the NVR, plugged in the drive and turned it back on – remember – no mounting holes. I’m sure the cavity in the NVR is an exact fit for a 3.5″ drive but I wanted to drop in a 2.5″ drive so I guess some adhesive tape is in order.
The NVR on powerup, sure enough, did not like EX-FAT and it decided to format the disk to FAT32. Seconds later it was finished. At this point the lag seemed to reduce to half a second or less. Maybe previously it was busy looking for a drive. Under menu – advanced – HDD INFO I discovered that the HDD had in fact been fully formatted.
It took me a few minutes to type the last paragraph and sure enough – right click – play , during that time, the NVR had been recording my every move from that camera.
Now I wanted to know more – menu – advanced, version – I spotted an onscreen QR code under which the word APP appeared. I used the scanner on my Android phone
And that took me to the Android Playstore and to the “XMEye Pro” APP (Huangwanshui). I hit install on the phone… looked like I needed to register. I tried and was told that the mailbox already existed. Maybe I registered this APP a long time ago? so I tried logging in with the first password of mine that came to mind – success. Camera “Balcony” said it was offline – crumbs, that must have been a long, long time ago. I hit + to register a new device. I was asked if I wanted to register a base station and told I could do it by scanning a bar code. As it happened I still had that barcode sitting on the screen attached to the NVR. Sorted.
By the end of last night I had a working rig (if one camera works, the rest surely will).
By early this morning it had dawned on me that the NVR was simply using my network as a WAN and had set up it’s on LAN (172.25.123.xxx). Obvious really. I plugged in a second camera to the mains (WiFi so no data connection needed) and it, too, automatically started to work with the NVR (and hence the APP). I took the original camera through to the far end of our building (L-shape – wide 200-year old stone with my office added on one end) – no miracles there, the original camera would not work. I brought it back one room – working. So about the same range as other WiFi I have around the place. NOW I had to figure out how to get that far camera to run through my main WiFi??
Meanwhile I have an old 2.5″ HDD spare along with an SSD I have to check out for Banggood – a nice Walram 512GB 2.5″ Sata SSD. I have already set that up on my PC via USB3 and it’s working fine – random read/write is working as well as my Crucial BX500 (480GB) – but as I can’t really speed test that absolutely right now due to the slow speed of my PC (no SATA3, just SATA2) I thought I may as well give the Walram SSD a go in this NVR. Here we go.
The NVR started up and spotted that the drive had changed – offered to format it – this takes seconds – done, no effort from me. And back to where we were – I’m making recordings automatically – this is pretty easy up to now. Please ignore the SSD sequential read-write readings on the right (top 2 sets of readings) as I took those tests on an old PC only capable of SATA2, actual sequential speeds will be much faster).
Next question – could I get the far camera now perched in the living room with weak but usable signal, to come in via my main subnet? Or would it need to be hardwired to do that? NOPE – but then, I was COMPLETELY on the wrong track. I left the original camera just within range, fitted a third camera in the far kitchen location which originally failed – and what do you know!! A MESH. Bear in mind that this is not a quiet radio environment here, I have 433Mhz radio mesh, Xigbee and several WiFi access points – the latter needed as this building is very old and solid.
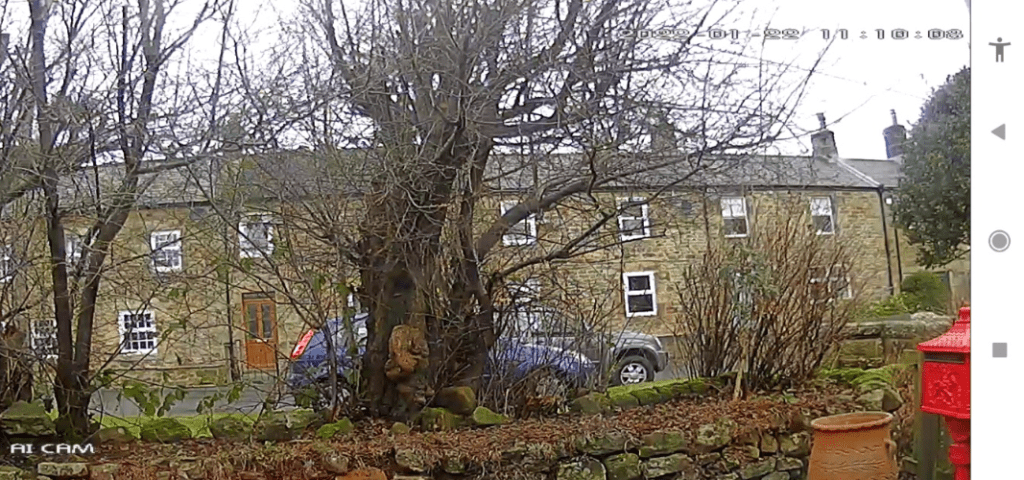
Finally, I picked a bedroom at random and plugged the 4th camera into the mains (via its power supply) and lo, it works TOO. The whole house is covered. This was just too easy despite the Chinglish notes (which weren’t really needed). Ok, the camera siting could be (and will be) better. Why are m images dull? For three reasons – my monitor is past it’s sell-by date, the weather here in the Northeast is utterly DIRE and I’d left the default SD mode in place rather than HD..
I’m “reasonably” happy with this setup.. if Banggood get me a replacement antenna I’ll be even happier – a black antenna on a white camera looks odd – but then the power supplies and leads are black too – white power supply could have been nicer, but I’m being picky. They do a BLACK version of the kit if you are into colour-matching.
So now I have 4 cameras running perfectly. Let’s take a look at how this all works on my monitor and the APP. The photo above is blue-tinted for reasons nothing to do with the camera system. It doesn’t have that tint in real life..
The APP view is much better – The APP (which regularly reminds users to change password without forcing the issue, a nice touch) can view 1, 4 or 9 cameras at once and a simple swipe takes you to single camera view – with options for SD (asyou see above) or HD view. Not only that but I deliberately turned off my phone WiFi so the incoming live stream was coming via mobile data. I Like it. I’m probably breaking all sorts of rules here as I can see right across rthe road – but it’ll all be pulled apart soon as I perched the cameras temporarily (obviously). The view below is through a window – I could watch for the postman from my office 🙂

At last, as decent a picture as I can get without any sunlight….. and more representative of what comes out of this system. And as I write this – my cameras are happily displaying and recording everything.
I must say at this point, armed with what seems to be the latest firmware etc, I am not entirely happy with the APP side of this… the APP let me happily rename 2 of the cameras, the other two however timed out on every attempt to rename them – and if you don’t like the time in the top right corner – sorry but this cannot be adjusted. Little details like this and the attrocious translations in the data sheet detract from what is otherwise a nice product. I later discovered that with the mouse on the actual NVR itself, you CAN easily rename all cameras so I’m guessing a simple APP upgrade would sort the issue I had… and how often do we rename cmeras anyway 🙂
Little annoyances: As the NVR powers up I notice a short message at the top “Disnable” which rapidly disappears. When the APP is updating cameras (a few seconds whenever you turn on the APP) you see “Is buffering, please later” – whould it REALLY take that much effort to get an English-speaking user to fix this stuff? How about early BETA users – I’m sure there must be lots of folk who would delight in fixing mistakes (I regularly tell Banggood if their own site has mistakes – gives my another purpose in life:-) )
While I’m on a roll: The documentation, what little there is with this product is LITTERED with stuff like this… “Dust on PCB may cause short circuit. It is suggested to clean the dust on the PCB timely to make the product work properly” – and WHY would the average user dismantle the box to get into the PCB – not to mention cleaning the dust rather than cleaning the PCB 🙂
Of the 4-sided “manual” one side says the NVR cannot be connected to your main network wirelessly while the next side describes wireless configuration of the NVR. For backup “insert U disk” – what’s a U disk? (I know – USB stick but that might not be clear to all). As for TIPS… “TAPS: when you backup failed, please check if your U disk is FAT32 format. NVR only support FAT32 formate U disk”. My point is – a couple of hours checking would have eliminated pretty much all of these and worse errors and made a decent enough starter guide. I’ll go looking for a link to the full manual online. Oh, no I won’t – there’s no link. For a tech product who’s APP relies on the user having an internet connection, would it not have made more sense to simply put a short slip of paper in the box pointing to an easily updated website manual?
I note in the spec a reference to FTP – that might be better than the somewhat overpriced cloud offering ($495 annual charge) No thanks, I’ll settle for storing videos on the NVR – which presumably would normally be stored somewhere secure. Sadly I could find no further reference to FTP after the spec.
So, is this worth it? With the discount probably yes, as I get more used to it, the system is growing on me.
Anyway, the link and info for the Guudgo Camera System is below:
Normal Price: $187.99
Coupon Price:$134.99 (around £99.61 with code)
Code: BGd99db9
Warehouse: CN
EXP: 28/02/2022
and for the Walram SSD:
Normal Price: $21.99-$71.99
Coupon Discount: 25% off
Code: BGa42236
Warehouse: CN
EXP: 28/02/2022
I can obviously only vouch for the 512GB version of the SSD – which looks to be around £39.83 with the code.


Does anyone have any recommendations (UK) for a midrange POE outside camera please.
Are you sure about that link at the top?
No Kevin, it was utter nonsense – thank you so much for the timely correction – fixed. If I’ve made any more howlers feel free to let me know 🙂
Regards
Pete