
I LOVE getting new stuff from Reolink – their WiFi, powered video doorbell takes centre stage on my front door here in Spain and as I’ve recently discovered, integrates into Home Assistant via the Reolink plug-in no problem. It also works on their Android APP, their PC APP and a PC web page.. so I have high expectations of the Argus 4 twin-lense 180 degree camera.
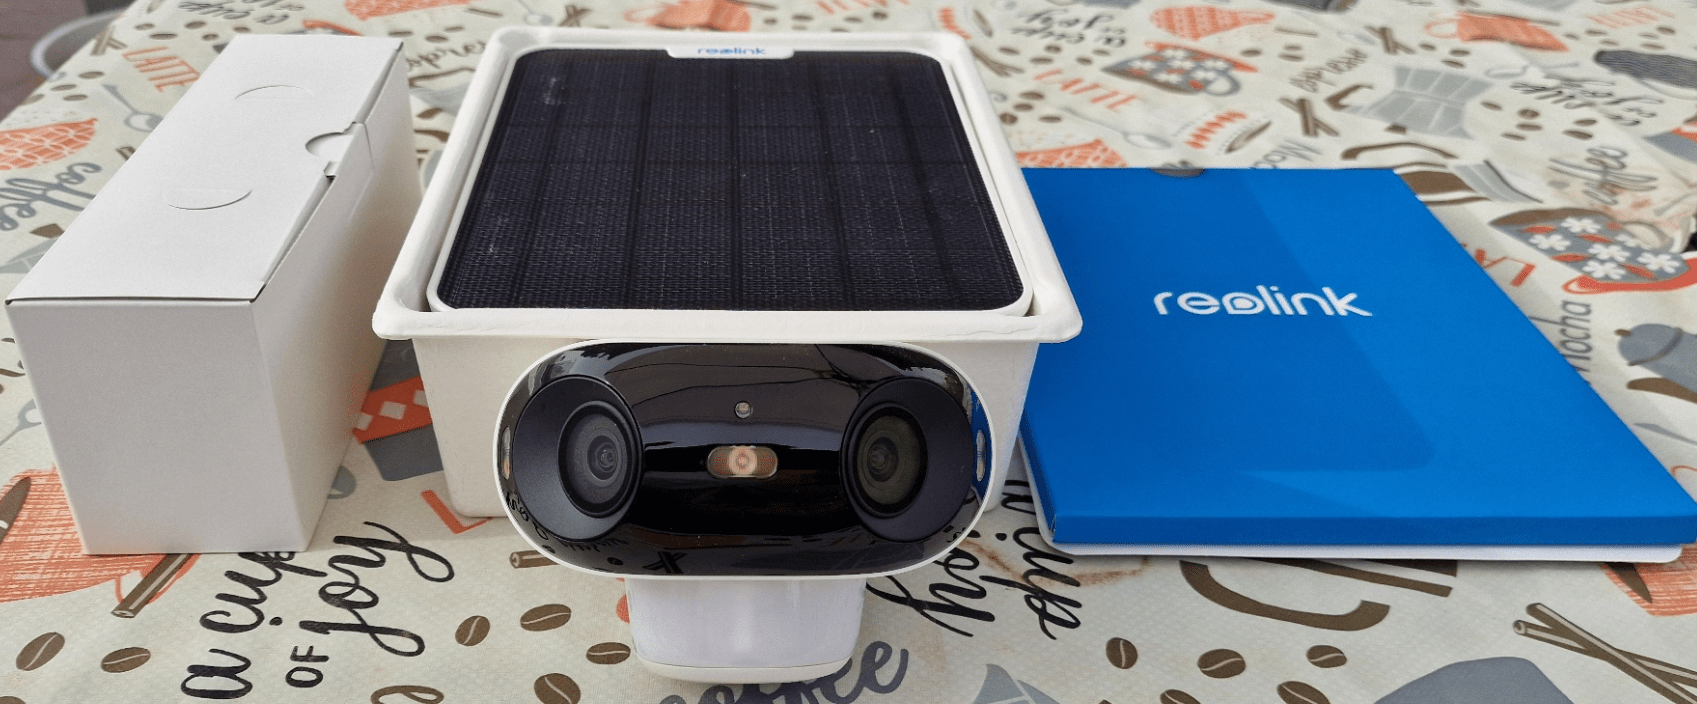
No, the Reolink Argus 4 isn’t dirty – it’s just plastic dust off the packaging – and the combined camera and solar panel (they are of course available separately) arrived very well packed.
I’ve been playing with this for a couple of days now, initially not connecting the solar panel – instead simply relying on the internal rechargeable battery in the camera itself. The APP at the beginning said the the battery was at 33%.
The solar panel is high quality as you’ll know if you’ve seen my other Reolink reviews and should be absolutely able to keep the camera running for weeks with intermittent poor weather (I’m basing this on my experience with other Reolink solar cameras which I ran over the winter). Note that the Argus 4 can operate on 2.4Ghz WiFi 6 and 5Ghz so I’m expecting VERY little lag.
As you see the camera comes with documentation and their website is full of useful info. I usually think of reading the manual as a last resort:-) and in this case just dived straight in – I already have the Reolink APP – and pointed my phone to the QR code on the camera (good idea – take a copy of the QR code on the phone – goodness knows what a couple of years of intensive sunshine will do to even a quality printed QR code) and within seconds the Argus 4 was added to the APP, up and running.
I noted a handy harness and USB C lead included.
While the camera was sitting in my office doing nothing, I added the Argus 4 to the Reolink PC APP which I just updated a few days ago for my Reolink video doorbell. Top left there’s a tiny “+” to add devices. The Android APP shows the UUID of the new camera so I used that and hit ADD. The PC APP also wanted the password I put on the camera while setting up in the first place.
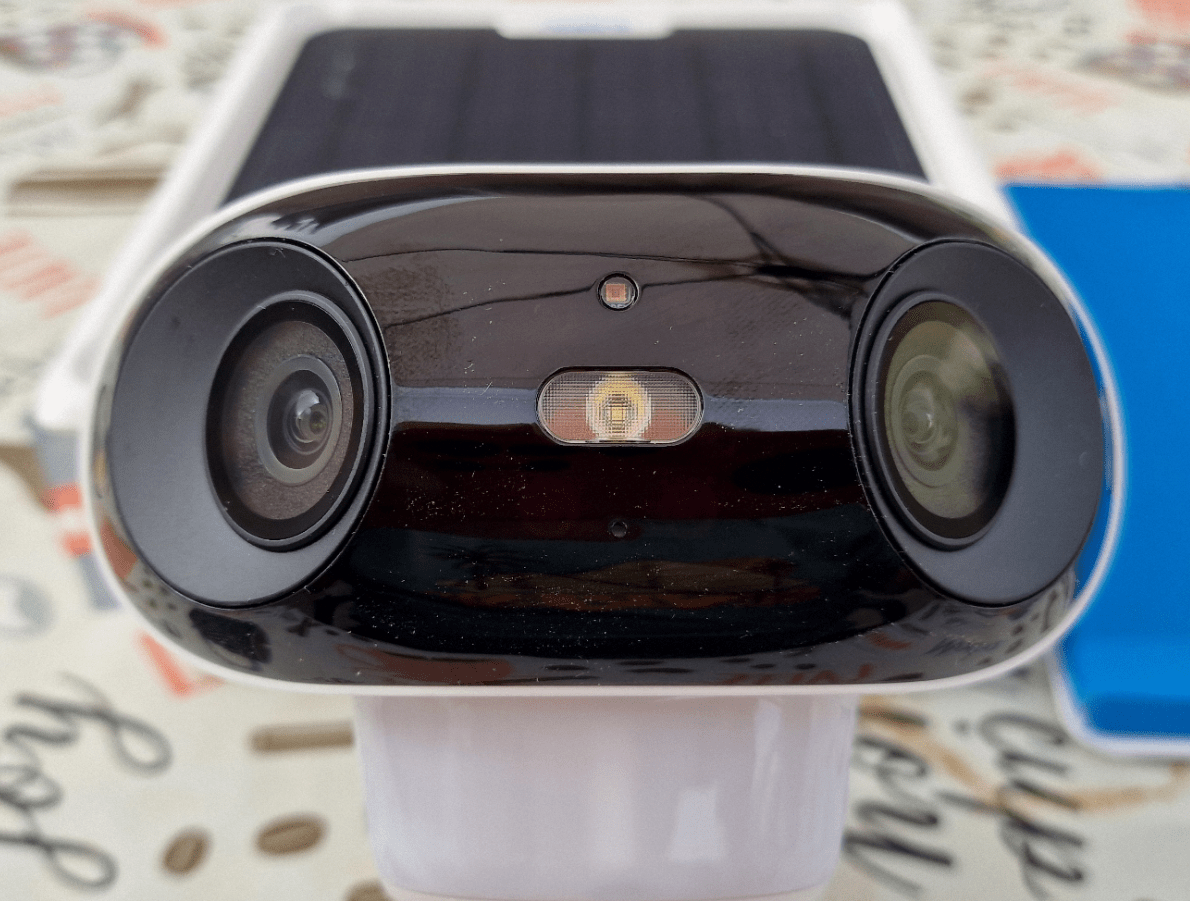
Ok, so I put the camera outside where it’s meant to be – the twin lens line-up does not (out of the box) do well closeup inside for lense alignment, either on the PC or phone. But with reasonable distance it’s just fine. In the process I noted the THREE blindingly bright LEDS were set to ON (movement sensitive) by default. Sorry I can’t show you our wonderful scenery that well, because after a VERY hot, clear Southern Spanish June day, the weather has suddenly gone to pot as you’ll see in the image below. Just as well the internal battery arrived somewhat charged though I later realised I could have just used a USB supply to power the Argus 4.
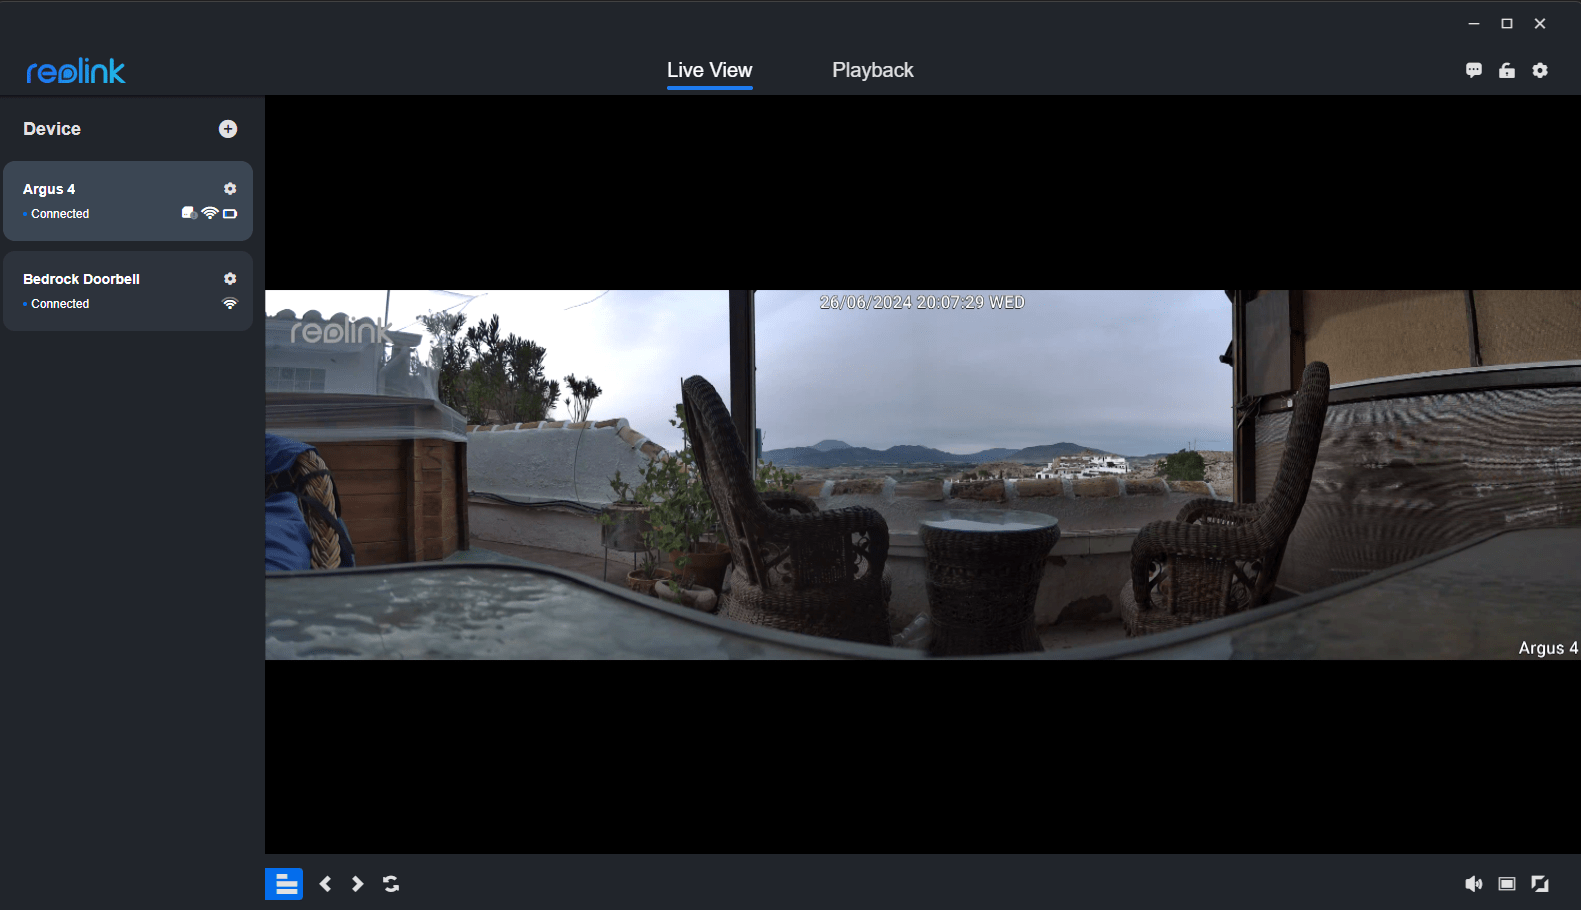
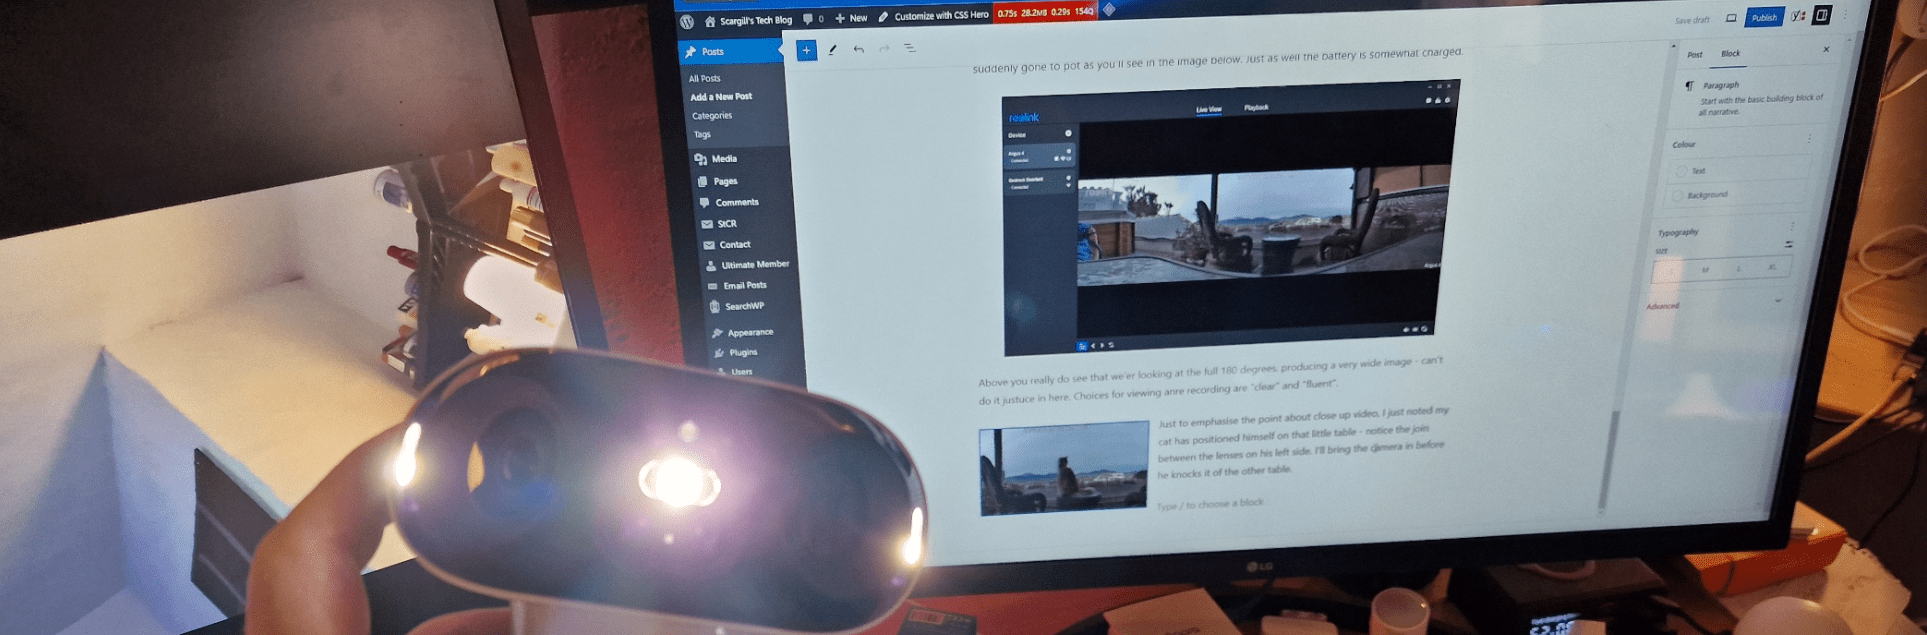
Above you really do see that we’re looking at the full 180 degrees, producing a very wide image – can’t do it justice in here. Choices for viewing and recording are “clear” and “fluent” – more on that below.
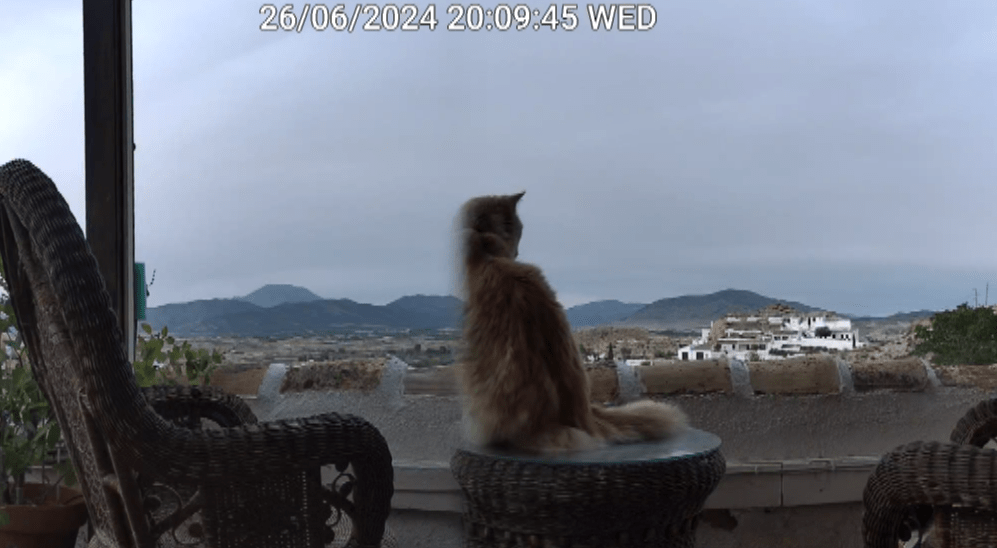
Just to emphasise the point about close up video, I just noted my cat had positioned himself on that little table – notice the join between the lenses on his left side (but see how this is handled by the APP further down – the camera is designed for giving wide angle coverage of outside property and surrounding area). time to bring the camera in before he knocks it off the other table.
Oh, the lights – well, they ARE bright.. but of course you can turn them off or use the IR lighting or nothing.
the Argus 4 will of course take a micro SD for local storage, resolution in “clear” mode is 5120*1440px at 15fps and in “fluent” mode that drops to 1536*432px – handy if you are on a slow connection.
Camera name can be positioned around the screen or hidden as can the date – and watermark can be turned on or off. For actual intruder detection you can easily set a “privacy mask” – sn slternative use being to stop the detection of plants in the wind etc. AHAH, under “advanced” you can adjust the stitching distance and horizontal and vertical offsets!! So much for my earlier comment.
You can set post-motion recording time which defaults to 8 seconds. and adjust what happens if you run out of SD storage (overwriting oldest files is my preferred setting on all Reolink cameras).
So far, so good – I’m suitably impressed. Ok, played all of the first evening with this – with the spotlights on etc. and the battery down from 33% to 22% – I guessed I really needed to give it a good charge – free via the solar panel if possible – otherwise simply by plugging the camera into a handy USB supply.
IP address, MAC and more are all available in the APP. You can also use FTP for online storage – no pushing a cloud service down the throat here. There are also options for push notifications, email alerts, FTP and there’s a siren. With an SD inserted you can show time-lapse…
I’m not seeing anything about RTSP here but then this is a battery camera – not mains powered and the Reolink site does say something about their battery-powered cameras not handling RTSP – a shame as this camera can be permanently kept charged by USB if preferred. If of course you’er happy to use the excellent REolink PC and phone APPs then RTSP (or not) will not concern you. I left the camera on charge and this morning got up before 5am and took the camera for a quick hand-held trip outside in the dark…
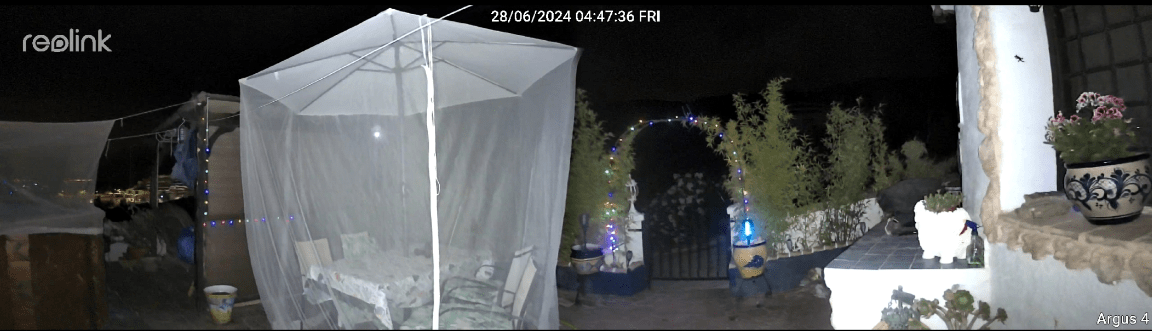
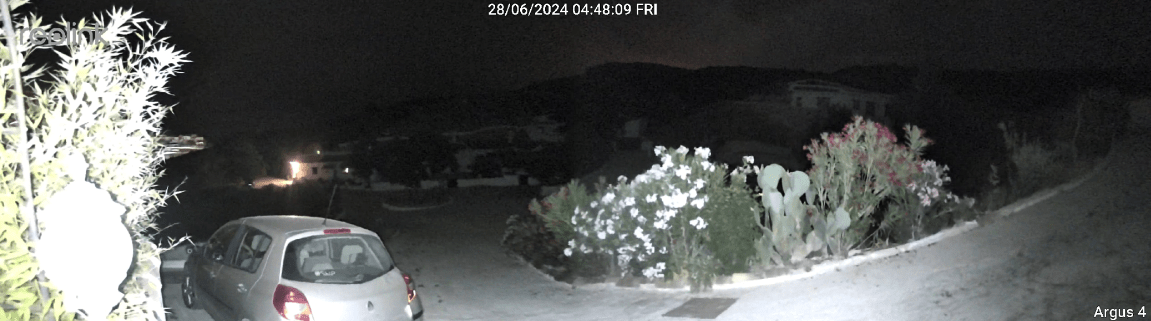
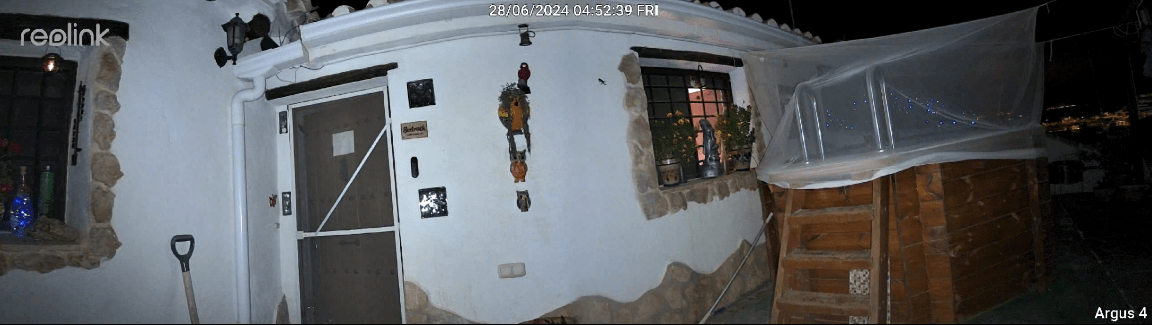
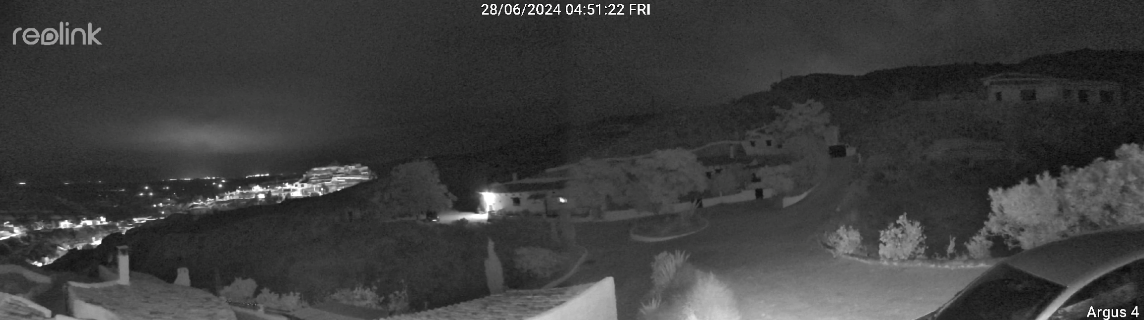
In the images above you’ll see the surrounding area in colour when the white movement-sensitive lights came on – monochrome otherwise. That last shot doesn’t do the camera justice – there’s a fair amount of detail considering the utter lack of natural lighting (and of course I’ve not yet done any adjustments – all of this is straight out of the box settings). In the colour night shots pretty much all of the lighting is coming from the camera itself.
Got that one. The hardware is fine. The software needs to go. The camera firmware lacks reliability. There’s so much movement this camera misses. I’ve tested it with a lot of movement and it’s a hit or miss. It misses a great portion of the day where clearly other cameras are able to detect and report namely kasa.