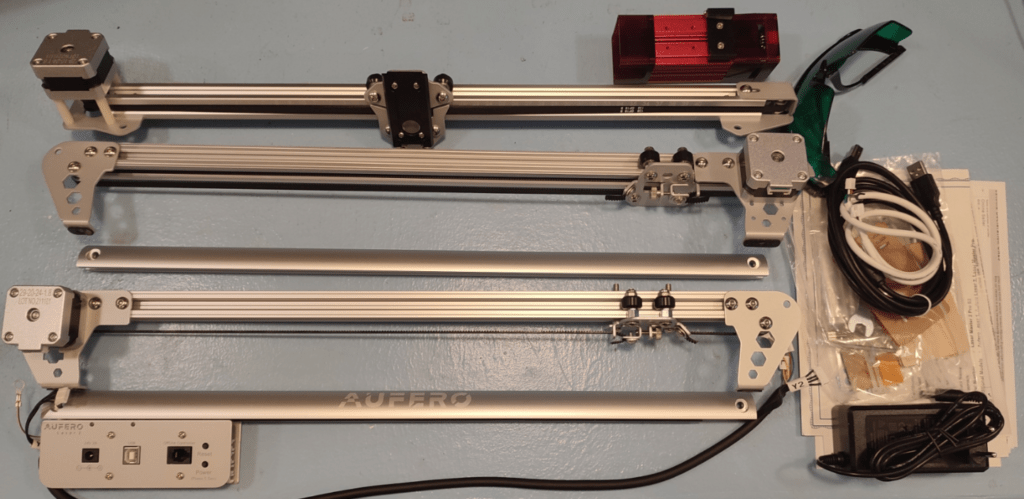
Here it is, out of the box, shiny plastic bags removed but initially unassembled – the latest from Ortur – my new favourite laser engraver company (since I got the LM2 Pro)
I have no doubt that some regular readers have had enough of me rabbiting on about my Aufero Laser 1 which I received just after arriving in the UK in November 2021 – I’ve had a MARVELOUS time with it (both devices have 3 laser head options), engraving all sorts of door and gate signs and learning about using Borax, engraving and cutting wood etc etc…but now it is time to move on – the big boy is in town. Engraving area 390*390mm and it is faster and more powerful than it’s predecessor at 10000mm/min max.
Laser 2 is a step up from Laser 1 – gone are the bits of plastic – this thing looks built to last and the front panel is LOVELY – right – on with the job – the clock is ticking. 10:30am. Look at THIS – only a small pack of bolts and bits, one laser this time (LU2-4-SF) – input 24v 2A, output 5500mw. That’ll do. On with the job.
Main power supply is 24V at 2A so not much margin for the steppers – but then I guess they don’t need much power. Off with the remaining plastic bags.
You can see on the right a couple of Allen keys and a spanner, some cable ties and a brush (not entirely sure what the latter is for but I’ll be using Borax for engraving so it’s welcome). 5 nuts, 5 washers, 10 bolts – this is looking easy already!
Samples include 4 pieces of thin ply, 2 acrylic, one coated aluminium – great stuff, pretty much as supplied with the Laser 1. Underneath, a shed-load of certificates to keep the pen-pushers happy. The “manual” has a total of 3 sides in English but points to the Artur website – seems reasonable to me – so, pretty much all of that paper can go in the bin.
I’ve blown 20 minutes getting this far and have yet to start on construction. I’m not going to rant on about specs – they’re all here at the Ortur website. Manuals, videos, you name it. Got the assembly manual up now. Autur stuff shoyld not be confused with cheap unbranded equipment – there is more support documentation than you ccan shake a stick at – not to mention Ortur Facebook support groups and YouTube videos. Take a quick look at my blog and you’ll see I’ve reviews lots of engravers – these are defnitely my favourites.
This is by far the most substancial construction I’ve seen to date. I LOVE IT. I’m only really doing this to prove I built it – the manual is clearer than my photos – couldn’t be easier up to now.. the hard part – the belts – are already pre-assembled. Each corner gets an M5 * 25mm and an M5 * 8mm bolt using the larger of the two Allen bolts. You see them in the left of the photo here on the left – the other two bolts were pre-assembled – so basically wjat’s left to built is just rto keep packaging size down – as I’ll rediscover when I take this device to Spain (wish I had a roof-rack).
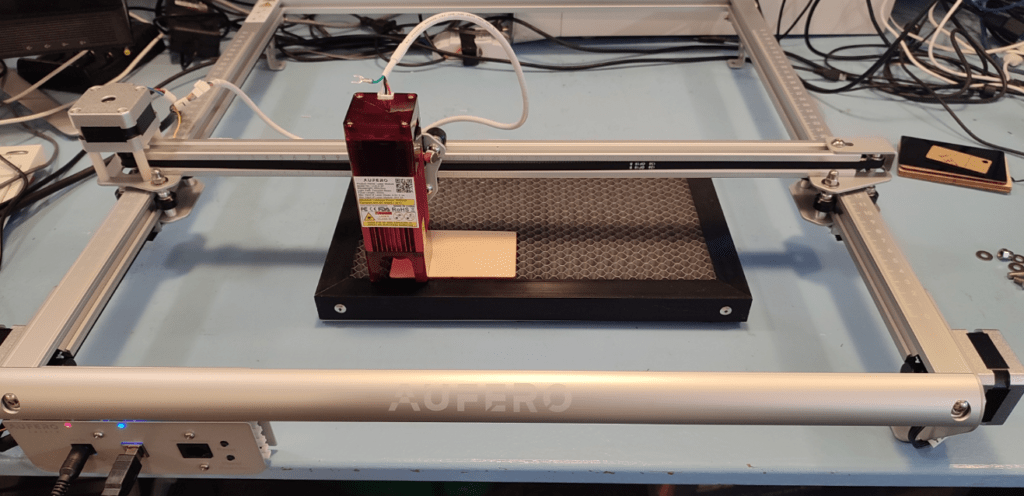
The 4 sides went together in about 5 minutes – could have been less but the last corner was a tight fit and also there’s an earth wire to go under the washer. Next, the gantry – a total of 4 nuts and washers – it simply drops in place. Did I say this all feels very solid.

Where the Laser 2 had two thin bolts to hold the laser, they’ve had a re-think this time, there is just one (far more substantial) bolt, easy to use and tighten and a much better fit. In the above photo you can see the angled bolt near the top of the laser heatsink on the right.
And now apart from a couple of connectors, I’m done – I seem to have 3 spare washers, 2 spare bolts and a spare nut unless I’m missing something.
Getting this far including taking the photos and writing the blog as well as actually putting the engraver together – under two hours – that’s a record for me – my last A3-ish laser took all day.
I can see where I have to fit the connector on top of the laser – but right now, no idea where to put the earth wire. I guess it’ll come to me (or I could break down and read the online assembly manual).
So why the Aufero Laser 2 as against the excellent Laser 1?
The latter was always described as entry level – and the size restriction caught me out on one gate sign though overall I had (have) few complaints. But here, I’ve loads of room and if you look on YouTube you’ll see that for engravers like this, people have already come up with conveyor solutions to allow for much longer engravings. Personally I’m happy with a 390 * 390mm working area. I’ll not go into a description of the LU2-4-SF as I put information and links in my Aufero Laser 1 entry.
For comparison you might check with my Ortur LM2 Pro article – the LM2 has some pro features like auto-shutdown fire button etc – but it is also more hassle to put together, fitting and cutting belts etc. The company have certainly learned from experience with this new model – how to make the initial experience more pleasurable. Yes, I will be using Lightburn again with this engraver.
The control panel is very familiar, 24v (supplied) power in – USB (supplied) lead in – press and hold the power button – there’s a socket for the (not supplied) remote conrtroller.
AH BUT – no limit switches on Laser 2 – how to stop Lightburn from sending the head flying off into space? All you have to do is turn off “auto-home on startup” in edit – device settings for the Laser (in Lightburn). That gem came from the very useful Lightburn forums.
I’m back from my overnight trip.
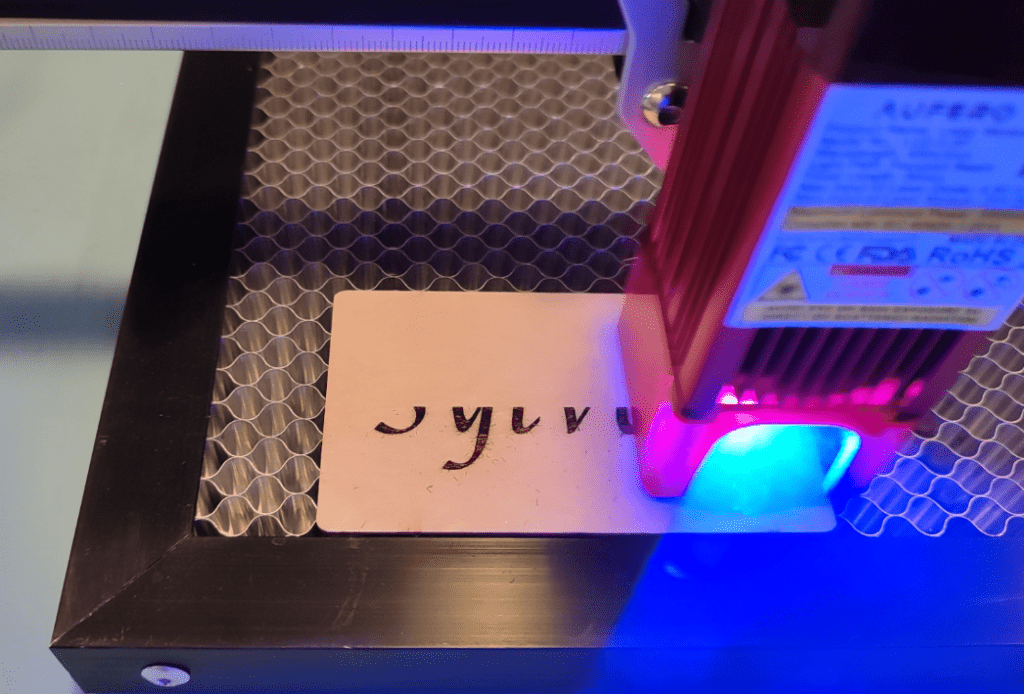
Have you noticed how many people show pictuers of engravers, even in reviews – with no cables? Sorry – fact of life. Now for a first test-fire – 50% at 6,000mm/min (the Laser 2 does up to 10,000mm/min) and one pass in this case. Here goes… and yes, framing works including SHIFT-FRAME (in the LAYERS tab) to get the outline.
Never thought of this, it HAS to be safe watching the beam via the phone camera. Here’s the first attempt – no special treatment – just the laser firing on plywood as above… (right burning photo and the left side of the image below)
and then, with Borax on the same wood (rightmost above)…. I know which I prefer. There’s an optional X-axis roller – I’ll cover that at another time. There is also a Z-axis lifter but the default Z-axis control on the Laser 2 is already better than others I’ve seen (if you’re new to this – Z is up and down). Back in Spain I have an offline controller – still never figured out what to do with it though. OH, I just found a use for the rotary roller! Engraving cooking utensils!
Guides include examples of engraving wood, glass, oxidizedd metal, leather, acrylic and more (I’ve personalised my wallet for example).And finallly – cable ties in place… thyat was fun.
ZBANX sent this device to me and as usual, I am NOT on any kind of commission… so here are their links.. in dollars – I’ll leave it to readers to figure out this lot below and the conversions (updated 10/02/2022)…
Promotion for Valentine’s Day:
Product name and link: Aufero Laser 2
Product Model:
①LU2-2 Flash Sale: Price $269.99
②LU2-4 SF/ LU2-4 LF: Flash Sale Price $369.99
Gifts:
①1st-3rd orders get a Free YRR 2.0 worth $89.99
②4th-6th get a Free Z-axis worth $69.99 everyday
MORE:
Limited flash price of Aufero Laser 1
Aufero Laser 2’s premier price offer extended to February 14
$20 OFF discount–(code: LOVE) for the two products:
Aufero Laser 1 & Ortur Laser Master 2 Pro S2
And of course – guides and product info…
Operation guide and material description:
https://docs.google.com/document/d/1TtbttZ4D7lmDUnT0cfVXv1y3W0I5Q920/edit
–Product information:
https://docs.google.com/spreadsheets/d/1hdTcrAGbROeIgtACu1NamVA5kmz94mT3gLfsLhhlSiw/edit#gid=0


