Just in (as they say in stores) this new laser engraver thanks to . The full title is “” – wow, there’s a mouthful – but did I just see WIRELESS? I initially took that to mean WiFi but it means Bluetooth – see below. Also – for 30w read that as 30w INPUT – the optical output is just over 5w but this is still a powerful tool able to both engrave and cut – and it is COMPACT.
Construction
The engraver arrived ALMOST fully-built – that is, the gantry and base were separate and the laser not mounted – that’s IT – I had no assembly work to do other than the above – a total of 4 nuts to fit and a couple of connectors to press on. It’s a lovely day so I decided to put the NEJE together outside.
I noted a red filter on the laser and red safety googles. All that seems a bit odd at first glance as every laser I’ve had to date came with orange filters and green specs. I guess with a blue laser, anything that doesn’t contain blue will do the job?
The unit I have here has a USA-style plug but Banggood supplied a reasonable USA-EU adaptor. The unit arrived with a 12v 4A power supply and after quickly assembling, I noted the unit has an adjustable laser. That again is new to me, previous engravers have pretty much had fixed-focus lasers requiring Z-adjustment (height). Tools are provided as you see in the images.
The act of attaching the gantry to the base with 4 nuts took less than 5 minutes including aligning the two halves using the tools provided.
And finally, the laser head itself: the holder was already pre-attached to the gantry so it was simply a matter of dropping the head in place and tightening up with the provided Allen key.
Unlike other engravers which usually need fine adjustment due to having fixed focus lenses, because the NEJE laser has adjustable focus, head positioning is not so critical.
My unit came complete with laser head referenced “module NE40640”. The module has it’s own red eye shield with a slot in the front for fine adjustment (it helps to have small fingers).
The cable on the gantry has an end-connector which simply clips onto the laser head in a second or two.
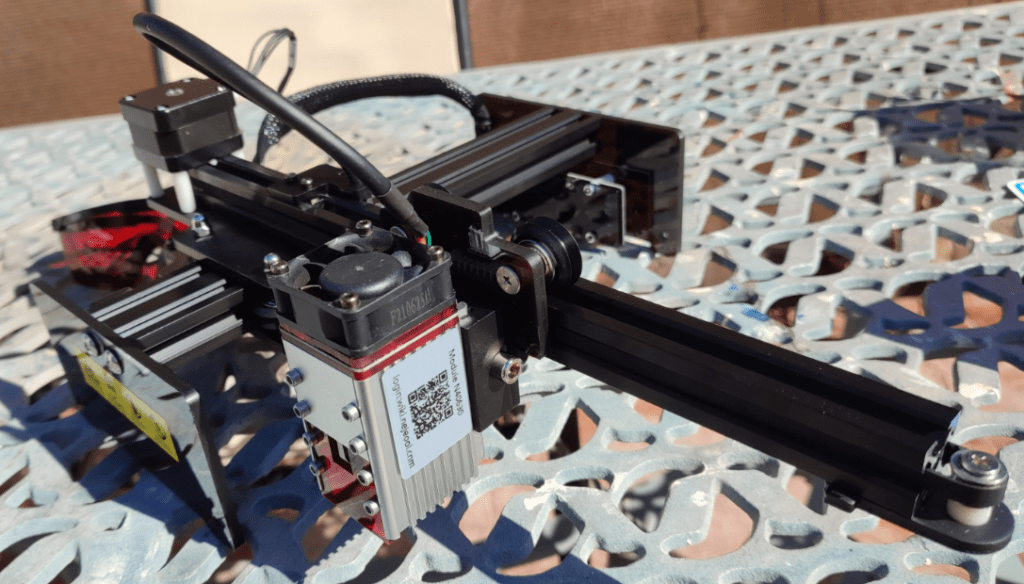
And there we are, a complete laser engraver, assembled and ready in very short order with a minimum of effort – in the sun.
As you can see from my photos, the whole thing appears quite substancial despite occasional use of acrylic and because of the construction method the NEJE Master 2S will take up minimal space on the bench – handy where space is limited (A3 size engravers are usually a TAD deeper than my workbench).
As well as the red safety glasses, the NEJE does come with a couple of pieces of sample material, both wood and acrylic, though for a first time user, a little more test material would have been nice. As it happens, I’ve no shortage of wood or acrylic having looked at several engravers recently and anyway, Amazon and eBay (UK anyway) have plenty such samples at low cost.
There is also provided a brush and cleaning tool with a sponge on the end and 4 brackets for hard-mounting on a bench – not needed to use those yet.
I really must direct you to the Banggood link above as there is a TON of information up there including a claim of 7.5W optical output for one laser option – though I’m sure mine is around 5.5w.
While assembling the engraver in the sun, all of 15 minutes worth, I noted that the belts were well aligned but not perfect. The Allen key provided is too large for wheel adjustment and I figured I might need to find another but on checking it looks like the alignment is good enough – no belt rubbing.
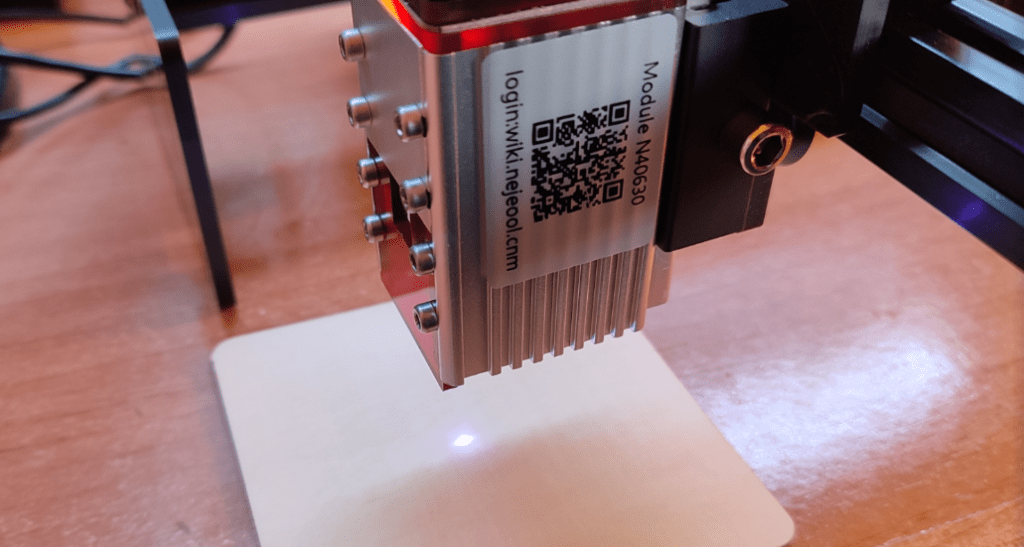
Turning it on for the first time
As for software, well, they mention several packages including Lightburn (my favourite but it isn’t free), NEJE Android and IOS APPS, NEJE Controller, NEJE Mac Controller and of course LaserGRBL (the latter is not a great deal of use unless you already have plenty of vector editing software and simply need a tool to actually send the GRBL code to the engraver. I guess most of us would prefer something that allows creation and editing of shapes and text – hence Lightburn.
There are video tutorials and you can download software (by the look of it covering all major platforms – I mainly tend to use LightBurn on PC – Windows 10 or 11. Apparently Lightburn will work from Windows 7 or above). It is possible that for Windows platforms below Windows 10, you may need USB drivers.
I took my life into my hands and plugged the NEJE into the mains before connecting to the PC.
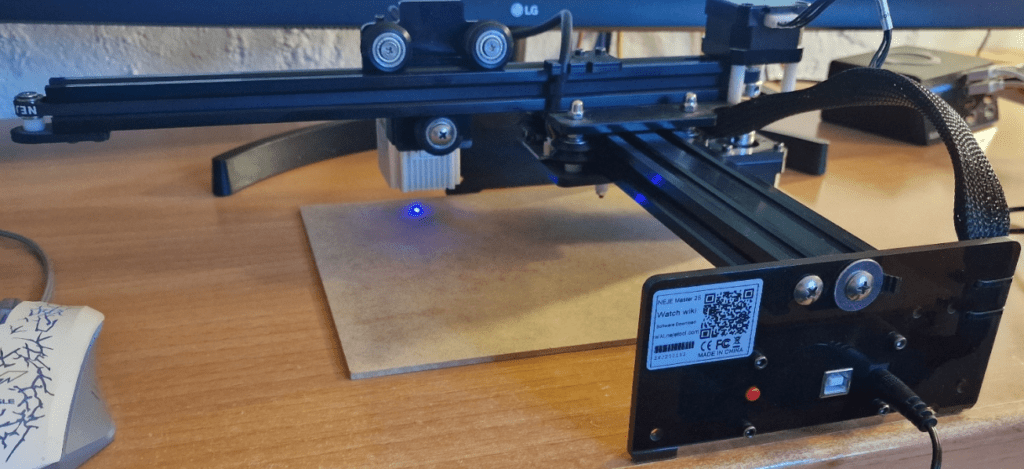
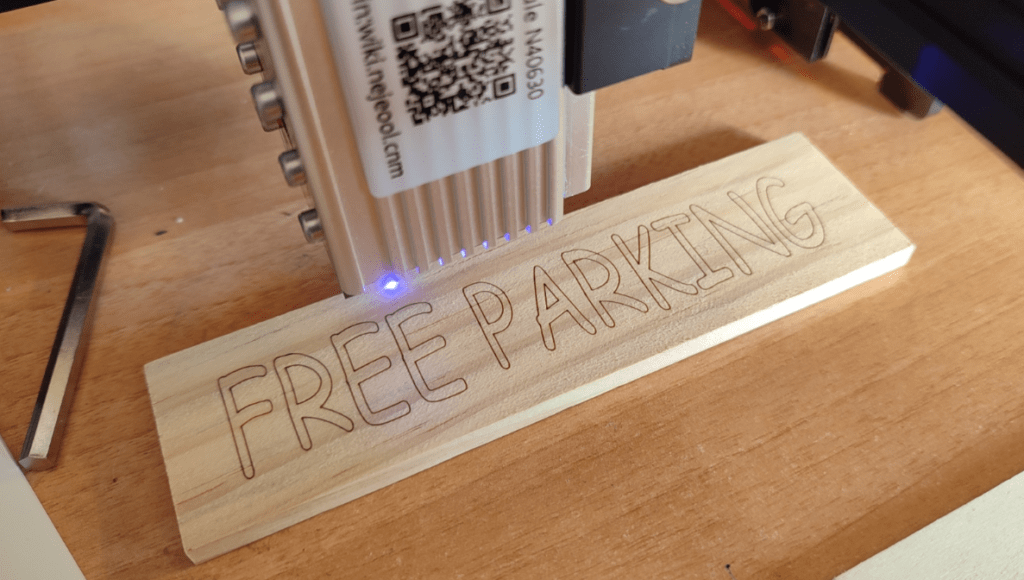
Every engraver I’ve had to date does nothing at that point, the NEJE fired up the laser immediately but at a low, safe level. See the blue laser spot above.
I tried a quick finger adjustment of the laser and I noted that the adjustment knob is somewhat recessed – not too good for my big hands. I wonder why the knob wasn’t made more accessible.
Next (I like to live dangerously) I pressed the little red button on the front which I figured might be reset – in fact it’s a HOME button. In the photo here, that brought the laser to the front right corner.
Software
The laser IS blue incidentally, so, off I went to the leaflet/manual that comes with the NEJE which contained a QR code for my phone with a link which thanks to CLIPT, I reproduce here. On that page I selected the latest NEJE 5.6.5 software. I could not find the software on the Google Play Store but it can easily be downloaded from the link above or directly onto an Android phone from this link. http://www.neje.club/download/20201119/NEJE_V2.5.apk – If the user’s phone says file can’t be downloaded securely – select “keep” – I just did. The file at the time of writing is just over 3MB.
In DOWNLOADS on the phone I spotted the file and installed it with the default “package installer on my Samsung S22 Ultra – simple. The installed package takes an image of yours, lets you preview it and then start to engrave. There are sample images to get you started, I chose Iron Man’s head.
You can add text to the image or draw, then move/resize by finger – typical for modern smartphones. But that’s about it for phone use.
Bluetooth APP connection
After selecting an image and adding some text, I went for gold and hit START. Note that the software connected to the engraver totally automatically by Bluetooth. This implies that you have Bluetooth turned in on your phone.
Note the App is V2.5, see the image and note that in my case the default power was 25%, default carving time 5ms. By hitting START I started the process of engraving – which proved that the engraver was fully operational.
So the NEJE APP is marginally better than the equally free PC LaserGRBL but don’t expect more from the APP than VERY basic control when it comes to adding text etc.
Having loaded an image and set width etc I found that it wnted to print the image in the centre of the working area.
If using this APP, be sure to use a full size piece of sample wood so as to avoid putting a mark on your work surface, until you get used to the operation of the APP – and never look directly at the beam.
Safety glasses are provide for a reason..
You can see above, the printing in action on my over-used sample piece of wood I keep for checking out all new engravers 🙂
At this point, enthused about the laser but with no use (to me) for the capabilities of the user-friendly but ultimately limited Android APP. I went straight back to Windows – and my copy of Lightburn – I paid maybe 55 Euros for it but you can download the 30 day demo for free with no catches. Current version of Lightburn (January 2024) is v1.4.01
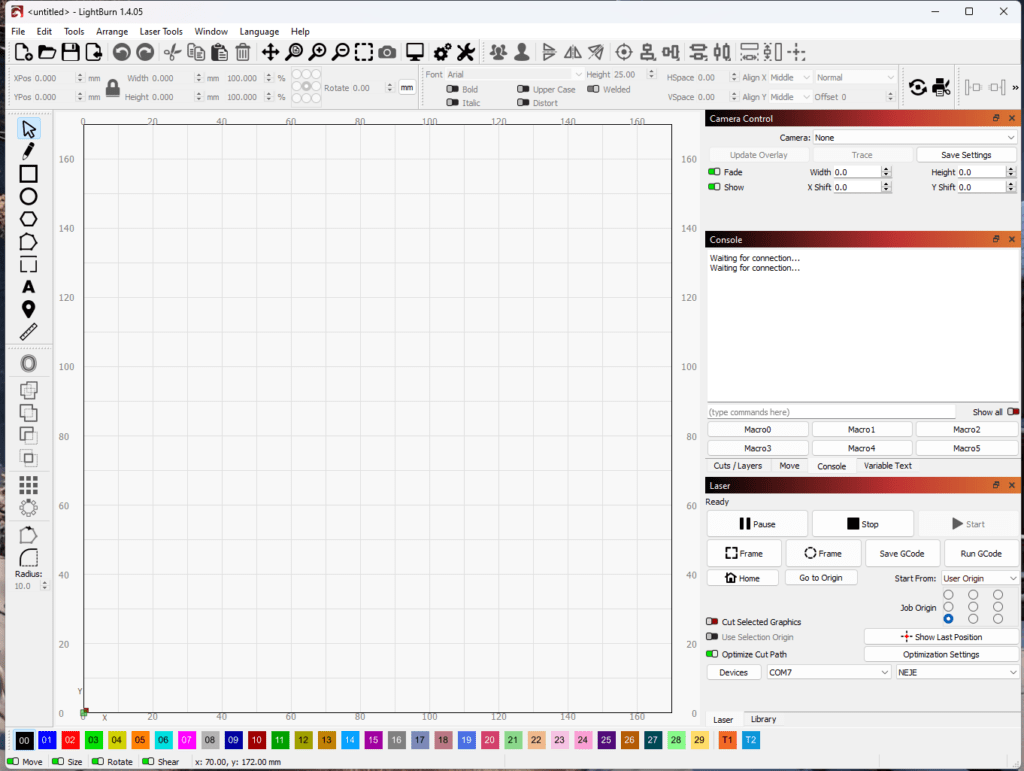
With the Lightburn software on my Windows 11 PC and USB connected to the engraver and my PC, no drivers, nothing happened until I selected a new device in Lightburn. When I hit the DEVICES button in :ightburn, it went off looking for devices and correctly identified the NEJE as a GRBL (170*170mm area) device on USB COM6. I was given the chance to rename the device and I simply called it NEJE. I used the default settings including allowing auto HOME. I seleted the device and the Lightburn console showed that it was homing.
It all just worked and the laser head decided to home (remember that the laser light defaults to ON at a safe level.
Lightburn is a whole subject unto itself and is the only software I’ve come across that I use for any kind of serious LED laser engraving – but let’s take a brief look at the NEJE control software for Windows – there’s a lot of detail and the downloads here –
http://wiki.nejetool.com/doku.php?id=nejelaser_master_2
When I originally reviewed this laser, the NEJE Windows software, though very basic, worked fine and in January 2024 I found the NEJE PC software has been upgraded (2022) to v5.6.5 and on myWindows 11 PC anyway, works no problem. I downloaded the latest version, installed and it immediately found the USB-connected engraver.
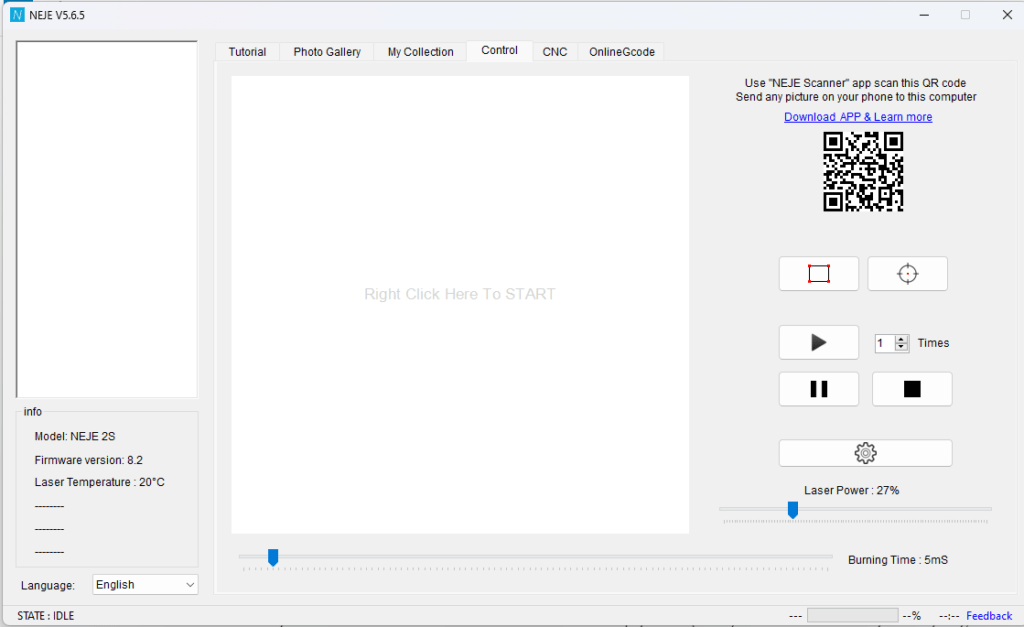
So, simple enough to use a sample image. I went in at the deep end – 100% power – 1ms engraving time. Within a couple of minutes my first small test image had printed no problem but by this time I’d had enough – too basic and limited – like the APP. The PC software specifically states that you should download some sample images you create using the likes of the free InkScape and that you can grab a laser engraver plugin from the NEJE website for Inkscape. I went off to the site to grab the latest version. https://inkscape.org/ – the latest version (v1.3.x) requires Windows 8.1 or higher, version 1.2.2 works with Windows 7. Version 0.92.3 supports Windows Vista and XP.
I went for InkScape v1.3 for my Windows 11 64 bit PC and installed before going off to look for the engraver plug-in. I found that but the whole operation was beginning to look like hand-cranking a car… so…
Back to Lightburn
Once I told Lightburn to go look for an engraver, it found the NEJE on USB port 7 and identified the maximum size of engrave. Done. The rest is a matter of selecting text and/or objects – sizing up and/or repositioning and then sending to the engraver.
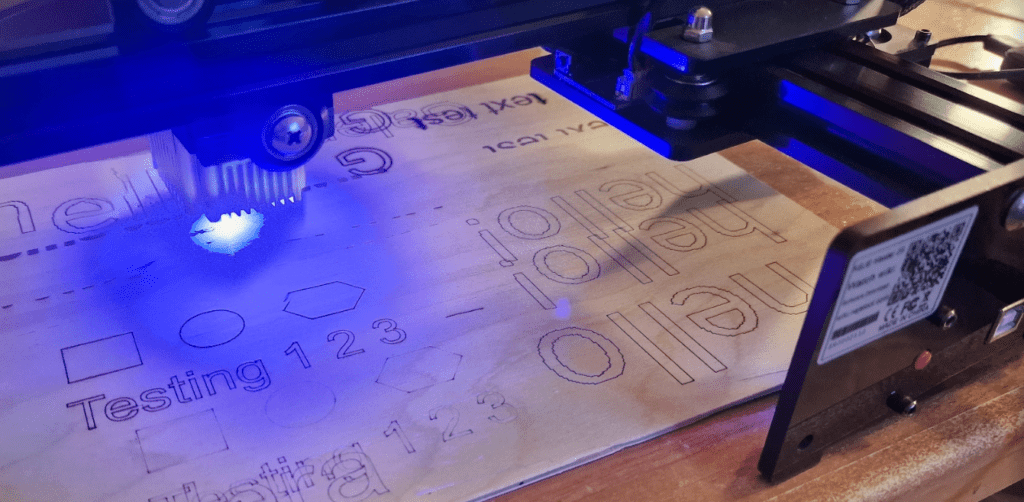
It turns out that the focal distance is really not that critical – and it’s easy to tell when the beam is out of focus as it elongates. A little test piece on rubbish thin plywood first (30mm long text – left image) and then a first stab on some decent wood below…
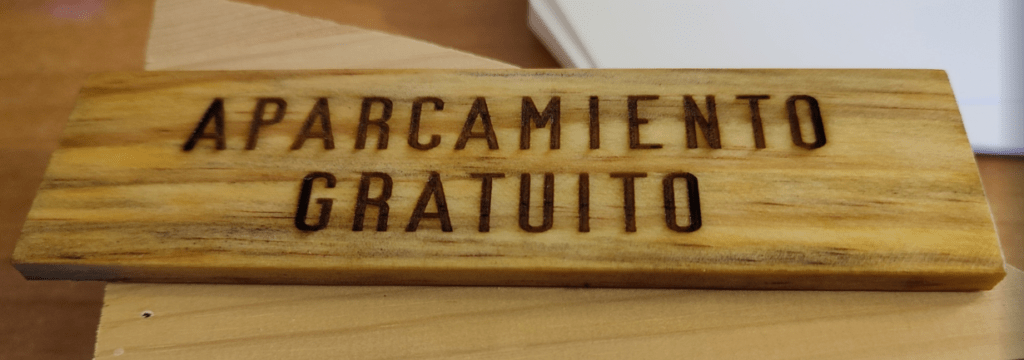
The above outline text – 1200mm/min, 100% – is lovely and sharp. If I switched from line to fill mode I’d have a nice, useful sign there. I still can’t seem to get good control of the minimum intensity for alignment but framing works a treat.
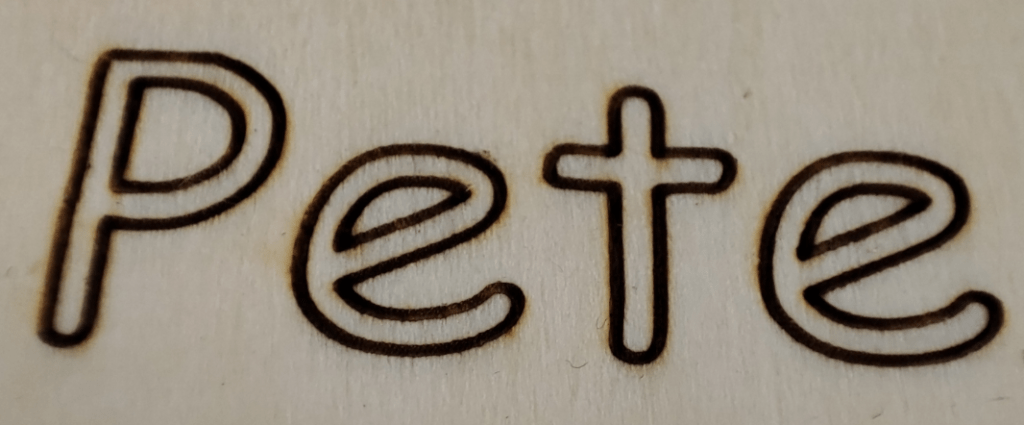
And here we are (below), edging nearer to a usable end result…. complete with a spot of oil for outside use, after engraving. It isn’t immediately obvious but the engraving on this last sign for the day is a good 1mm+ deep and sharp-edged as you could want (I can see and feel the depth of engraving but it simply will not show up well in a photo). I’m sure that wasn’t the best choice of wood but it’s the only wood I have right now that is 5mm thick and hence good enough for a small outdoor sign.
I bought a blower (fish tank) for air assist but then twigged to simply putting our HENRY vacuum hose within hand’s reach of the centre of action. I have to say it works to save me getting gassed.
Granted the NEJE Master 2S will not handle the same jobs as A3 monsters like the Ortur, but for many uses (most of my engravings to date) it is big enough. It also has a solid feel, works well (at least on the PC) and I could already see it easily cutting through 3mm material.
Meanwhile I grabbed my two material samples (green acrylic and black coated metal) – BRILLIANT results. I need more material samples.
Here’s a thing: The clear green acrylic tag above made almost no smell at all and was not that deep (but looks lovely- I’ve deliberately masked the actual address in the photos above left), I’ve now just done a black opaque engraving, it made quite a pong, doesn’t have the grey engraving effect, instead at the same power it has made a much deeper engraving.

I’m learning rapidly – just need more material – much more. I like this little engraver.
And now – Cutting!
What did I say about cutting through material? I found one each of sheets of RED and BLACK 3mm acrylic which I’d forgotten all about.
SO… I grabbed my sheets and started experimenting with cutting as I’m having difficulty finding acrylic blanks here in Southern Spain, so I thought I’d have a go at cutting my own – with great success as you can see above – both of the tags were cut out from larger acrylic sheets.
See above, the small black piece (my first) has a 2mm hole, the larger black has a 5mm hole, the red rounded rectangle has a 4mm hole – and checkout the piece I cut out – so little loss it’s a good example. The red hole is exactly 4mm dia, the round piece is around 3.7mm dia. I just left the line width settings as standard. See the imprefections in the red hole – that’s at the back, the front is even better.
Blown up (right), you can see that the hole cut isn’t perfect, but to the naked eye it looks excellent. I did all of this with Lightburn.
I absolutely recommend anyone considering engraving to look at Lightburn – it’s in a different world to the free software that comes with most LED laser engravers and with this engraver as with others I’ve tested, IMHO it’s a must – no doubt there are instructions for using Lightburn with other operating systems – my experience is with Windows.






The offline controller I have does a little more than allow file upload. It has a websockets browser interface allowing full control of the machine. I can’t imagine why Lightburn couldn’t do this – I guess it depends on a cooperative client which they can’t guarantee?
You really must dip your feet into the world of CNC routers! The 3018 Pro I have is outstanding value:
https://www.vevor.co.uk/wood-engraving-machine-c_11142/3018-pro-cnc-router-laser-engraver-engraving-machine-w-offline-controller-grbl-p_010225409807
After a few hours I was turning out great stuff! I’m a big laser fan but this will effrtlessly, if slowly, cut 10mm plywood very precisely. Hopefully I’ve attached an example…
Sadly there’s certainly no shortage of rip-off artists out there 🙁 They say a fool & his money are easily parted!! Ebay seems to be particularly bad just now.
I have a k40 laser which I’m looking to make Lightburn compatible. Thinking of buying: https://github.com/makerbase-mks/MKS-DLC32
Ironically I am moving home to Northumberland imminently so my scope for experimentation is limited…
With luck you can see a plaque I made for my dog. It’s cut from 9mm plywood using a 3mm & 1mm cutter. It’s about 28cms x 15cms. I used Easel software (CNC equivalent to Lightburn but nowhere near as good!)
Basically it was engraved (a little too deeply) painted & then sanded.
Yes the offline controller does a bit – but as I’d like to do everything through LightBurn it’s really not ideal for me. I may well have a go at engraving – probably when it cools off a bit.
That link worked but they are out of stock – and being predominently based in Spain, buying from the UK is now a tad expensive of course. One of my lasers will go through 10mm wood – VERY slowly.
Whereabouts in Northumberland? Anywhere near Bellingham?
Not seen Easel until now, but then I don’t have an engraver so I wouldn’t have 🙂
Hi Peter,
This is a little off topic so bear with me…
I recently bought a 3018 Pro CNC engraver from Vevor in the UK for the princely sum of £115.
It’s great!
It came bundled with an offline controller. This seems to be quite common, these machines can make a lot of dust so it can be useful to keep your PC at a distance. Typically you’d put your data on a SD card & plug this into the controller to use the machine independently of your PC.
Apparently these controllers are usually STM32 based – not mine! It’s ESP32 based & has a web interface 🙂 I can upload files to it & control the machine from anywhere (ideally the next room).
The offline controller is a serial device & should work with any CNC machine that has the usual 8 pin offline connector.
I’m a little surprised that these things are not actively marketed!
This was a totally unexpected but very welcome feature of my machine!
As a feature this warrants a few lines in the ‘manual’ but NOWHERE does it tell us the AP password!! Very useful…
It’s: 12345678
A little off-topic is fine – I know zilch about CNC machines – but for the laser engravers, one had a WiFi interface – but only for file transfer – and I’ve since found a Sandisk WiFi-USB stick – send files to it via Wifi and it looks like a USB stick to the engraver – I THEN found an article on using an RPI-ZERO-W to do the same job – there’s a story unto itself…
Ultimately though, much as WiFi file transfer is ok, the remote units don’t let you fully control the laser via WiFi – what I would LIKE is for LIGHTBURN to fully talk to the engraver over WiFi – but the Lightburn guys up to now say “can’t do”…. that’s a shame.
Ok, while I’m on a roll, I was going to write a blog about the unfeasible current cost of RPI-Zero-W but as I’m here anyway.. this is what I started blogging:-) Rant mode on…
“Is it just my imagination or has the whole world been taken over by thieves in the wake of Covid? I saw an article about using a cheap RPi Zero W (not the version 2, the original) as a WiFi to USB convertor – not a bad idea I thought – until I started looking at pricing.
One enterprising con-artist on UK eBay is after £60+ and £24+ shipping to Spain for a single Raspberry Pi Zero W!!!! Putting aside his/her laughable price for this fiver’s worth of toy controller (I’m an RPi-4 kind of guy), it would fit in a bog-standard thin envelope – even post-Brexit I could see no more than £10 postage. For this kind of money one could buy a second hand proper computer. I just bought a pre-made WIFI-USB adaptor inc 32GB of storage for a reasonable €15 Euros all in… if this kind of rip-off behaviour doesn’t put an entire generation off dabbling in electronics, nothing will.
Unbelievable. paradise_pc – in Barnet, UK – someone send him a nasty-gram please.”