
I’ve written elsewhere about Apollo Sensors but this weekend they sent me a set of updated Temp-1 and Temp-1B sensors so I thought I’d give them a quick entry. I’ll leave the Temp-1B to the end as it is similar but primarily battery driven and NOT a cheap battery at that – and proceed to describe the TEMP-1 which is ONLY USB-powered.
Now many of us are aware of various Home-Assistant-compatible temperature sensors out there and I’m a great Aqara fan – but I’m getting increasingly tired of changing batteries so this is worth a mention. Where practical, I plan to go back to using powered sensors. I opened the box, plugged the Temp-1 into USB and followed the simple instructions on the box…
- Plug device into power
- Connect to Apollo hotspot
- Open browser and go to 192.168.4.1
- Select WiFi and input password
- Check Home Assistant discovered devices
A few assumptions there.. possibly “Connect phone WiFi to the temporary Apollo hotspot” might’ve been clearer for beginners? I don’t have WiFi on my PC for example.
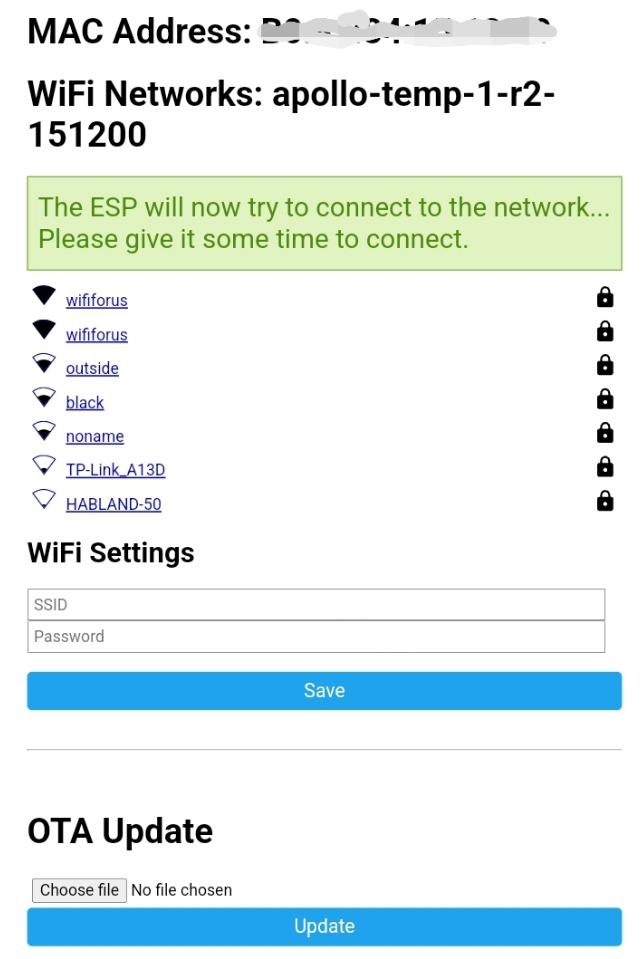
Ok, so, done, simple – I then opened the phone browser, selected 192.168.4.1 and sure enough a choice of my access points appeared. I picked the nearest to test. See photo right…
The Apollo access point immediately disappeared so I went back to the PC to look for new items appearing on my router clients list. Sure enough, a new device – Apollo TEMP-1151200 appeared.
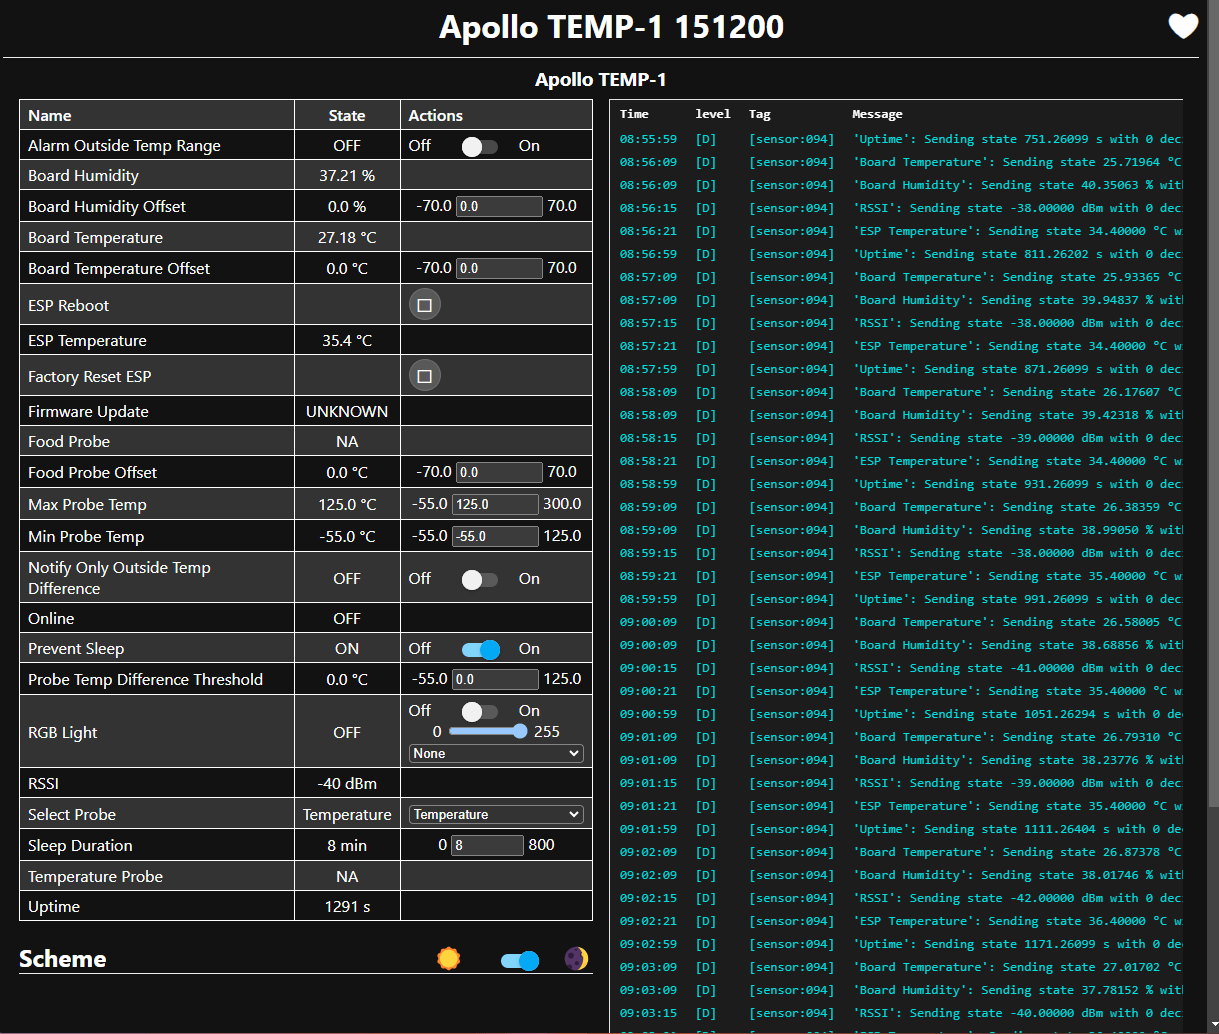
I opened Chrome on my PC at the indicated IP address and.. well, that was simple.. At this point I’d not plugged in any of the available sensors but on-board temperature and ESP temperature were both in there – see image below…
In the photo above you see “select probe” – you have a choice of two – a temperature sensor or a food sensor. So, probe NA – not available. I plugged in the temperature probe but even after waiting a couple of minutes, still NA. So I disconnected the USB power – reconnected, waited less than 30 seconds and…
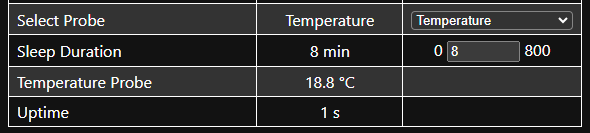
Suer enough – the probe was added in… there it si sitting at 18.8c over on the right image – this is a DS18B20 sensor, it looks like your typical AliExpress sensor on a lead, stainless end but with a stereo 3.5mm jack at the other end. There is also a line in the logs which tells you it’s a Dallas sensor.
You have a nice bright RGB light which you can turn on and off and control brilliance from the web interface – but note – the light turns off on power cycle. Note that the internal board sensor also has humidity but of course the plug-in DS18B20 sensor does not. I also noted in the list above that a firmware update is available.
I went off to my Home Assistant setup (on my NAS) and checked to see if the new device had magically appeared…
In Home Assistant – notifications – “New Devices discovered”. Just to be clear, I do have the ESPHome Builder add-on installed in Home Assistant. But that’s it – I didn’t have to do anything. See photo – I pressed the HA onscreen button to ADD the device…

So then I noted that one new device and 23 “entities” had been added to my Home Assistant setup. I did nothing – just made a mental note.
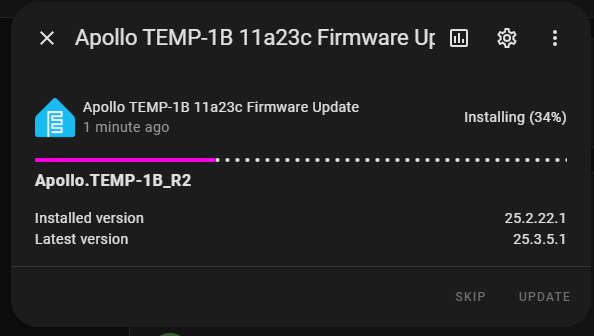
As if by magic, in my Home Assistant settings, only seconds later – this update notice appeared – see below….
If only life was always this easy – I get similar notices for my Sonoff BSP (water controller) device but the updates never happen.
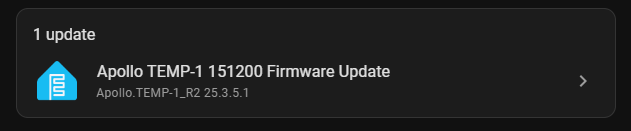
Existing firmware 25.2.22.1 – latest version 25.3.5.1 – OK, why not… “Update”. Done. So – that light… in Home Assistant, the relevant entity in this case is “Apollo Temp1 151200 RGB light”.
Simply going into HA settings – entities and picking that entity lets me have a play including turning the light on, setting the colour and so much more.. but again, if I disconnect the USB and reconnect, the light again defaults to off. Ah well, I guess it is just an extra bonus. See photo below, the Apollo Temp-1 with temperature sensor and USB power plugged in. This is great fun and of course any of those entities can be added to an HA dashboard or used in automations.

Oh and in the photo above right, next to the ventilations slots, there is a reset button in there. It is worth noting that these and other Apollo units are in cases that look like low-volume 3D printed jobs – but well made, non-the-less.
Bonus April 2025
There I was having a chat about an almost undocumented beeper in the MSR-2 (and MTR-1) devices and Apollo showed me how to make use of it. Sadly the piezo beeper is too quiet to be useful in these devices but useful in the TEMP-1 and PLT-1 device.
So, in Home Assistant, go to DEVELOPER TOOLS – ACTIONS – key in buzzer and try one of the examples in this page. Instant gratification 🙂 I’m sure you could make an over or under-temperature audio alert….. here is a link to some examples….
So I tried one example:
action: esphome.apollo_plt_1_b2d9a4_play_buzzer
data:
  song_str: >-
    smb:d=4,o=5,b=100:16e6,16e6,32p,8e6,16c6,8e6,8g6,8p,8g,8p,8c6,16p,8g,16p,8e,16p,8a,8b,16a#,8a,16g.,16e6,16g6,8a6,16f6,8g6,8e6,16c6,16d6,8b,16p,8c6,16p,8g,16p,8e,16p,8a,8b,16a#,8a,16g.,16e6,16g6,8a6,16f6,8g6,8e6,16c6,16d6,8b,8p,16g6,16f#6,16f6,16d#6,16p,16e6,16p,16g#,16a,16c6,16p,16a,16c6,16d6,8p,16g6,16f#6,16f6,16d#6,16p,16e6,16p,16c7,16p,16c7,16c7,p,16g6,16f#6,16f6,16d#6,16p,16e6,16p,16g#,16a,16c6,16p,16a,16c6,16d6,8p,16d#6,8p,16d6,8p,16c6
then put the result into an automation I could test – all that needs is a condition…
alias: Test Buzzer (Manual Trigger)
description: Play the Super Mario Bros tune on the buzzer when manually triggered
triggers: []
actions:
  - data:
      song_str: >-
        smb:d=4,o=5,b=100:16e6,16e6,32p,8e6,16c6,8e6,8g6,8p,8g,8p,8c6,16p,8g,16p,8e,16p,8a,8b,16a#,8a,16g.,16e6,16g6,8a6,16f6,8g6,8e6,16c6,16d6,8b,16p,8c6,16p,8g,16p,8e,16p,8a,8b,16a#,8a,16g.,16e6,16g6,8a6,16f6,8g6,8e6,16c6,16d6,8b,8p,16g6,16f#6,16f6,16d#6,16p,16e6,16p,16g#,16a,16c6,16p,16a,16c6,16d6,8p,16g6,16f#6,16f6,16d#6,16p,16e6,16p,16c7,16p,16c7,16c7,p,16g6,16f#6,16f6,16d#6,16p,16e6,16p,16g#,16a,16c6,16p,16a,16c6,16d6,8p,16d#6,8p,16d6,8p,16c6
    action: esphome.apollo_plt_1_b2d9a4_play_buzzer
mode: single
End Bonus
In the end I decided to try the Temp-1B with only a USB supply – no battery – “Apollo TEMP1B Hotspot” appeared on the phone when checking available WiFis… procedure exactly as for the TEMP-1. Indeed I found everything the same once I got onto my PC browser except that the firmware update option simply said “unknown” until I plugged in the food probe at which time – “update available” perked up – I went into Home Assistant and was offered the chance to add the new device at which point, the update option came up in HA and I did the update – no problem. If for any reason you ended up with a TEMP-1B and had no use for the battery option, aside from the case height they seem the same to me.
If anyone has questions about Apollo Automation products – it’s all in one place on their WIKI.