
This might be of interest to those of you who own one or more Raspberry Pi 5 boards (NOT previous models such as RPi3 or 4). Important February updates at the end.
Argon40 have been around for some years now, producing a range of cases for various Raspberry Pi models. I’ve used several over the years and on September 17, 2024 they sent me a couple of their latest cases for RPi5 – the “Argon Poly+5 with PWM fan” and the “Argon POLY+5 with THRML 3-AC”. Shortly thereafter they sent the NEO5 case + M2 NVME board.
I’m personally interested in the NEO5 with NVME as I’ve planned for some time to use my RPi5 with NVME – and SD for backup using RPi-clone (I wrote about the latter here – the original rpi-clone no longer works with the latest Pi-OS and RPi5 but there is a way around it thankfully – see link above).
Meanwhile just a quick mention about the two Poly+5 variations:
Poly+5 with PWM fan first… here is some imagery…

First impressions – well packed – nice, quality case – adequate aluminium heat sinks and the fan looks pretty standard – and that’s all I can say about the latter – bear in mind that none of them last forever. I have 2 variations on this case – one has a red clear top allowing you to see the fan, the other has a dark grey clear top.

There is a snap-on cover to protect your SD. The manual is quite thorough for 4-sided job.. but makes no mention of PWM so I wondered if you have any control over fan speed.. so I went off to the Argon 40 website.
I found the manual which is just a PDF of the 4-sided job that came with the fan.
In the past, Argon40 would make available scripts to control fans – but I’m not seeing anything on the site or after a quick look at their forums.
Meanwhile TIM (see comments) has the answer. Also – on being queried, Argon40 rapidly came back to me – and I quote:
The FANs connected to the POLY+5 and NEO 5 are now controlled directly with the Raspberry Pi 5 by default. If the user wants settings outside of the Raspberry Pi default settings they need to set the settings in the firmware via config.txt

The Argon ONE V3 still has our MCU controlling the power button and the fan speeds, which we also dropped in the Argon ONE V5.
And so, onto the POLY+5 with THRML 30-AC.

So this case has a much better looking fan/heatsink arrangement but again I can’t at first glance find anything about controlling the fan speed via a script – again see TIM’s comment in the comments section. The package is well boxed and comes complete with adhesive foot pads, thermal strip and 4-sided instructions. The top lifts off and the cover above the USB and network connectors can also be lifted off if need be. I have one unit with the dark grey clear cover and one with the clear RED cover – I prefer the former, others may disagree – in both cases you can see through them to see the fan operating (or not). One is referred to as “BLACK” – the other as “BRED”.
In both cases the fan/heatsink arrangement is unpainted aluminium.
As usual I’m not going to get into pricing other than to say these are inexpensive and of course, price inc tax, duty (where applicable) and postage will vary depending on where you live.
I’ve made no comment about the on-off button cover on these boxes as I have yet to turn on or off an RPI using a button.
NEO5 NVME case +SSD
And now the long-awaited NEO5 case + M2 NVME SSD.
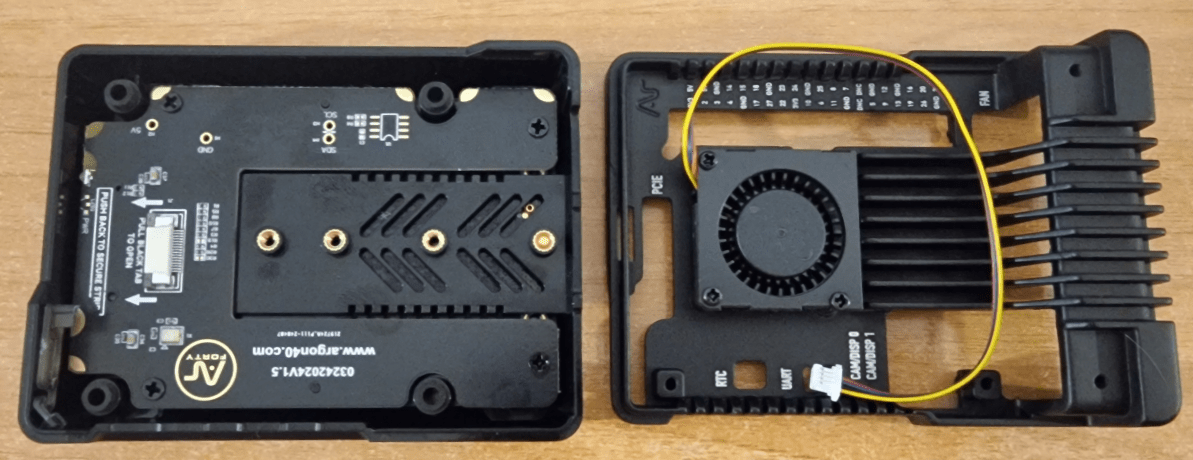
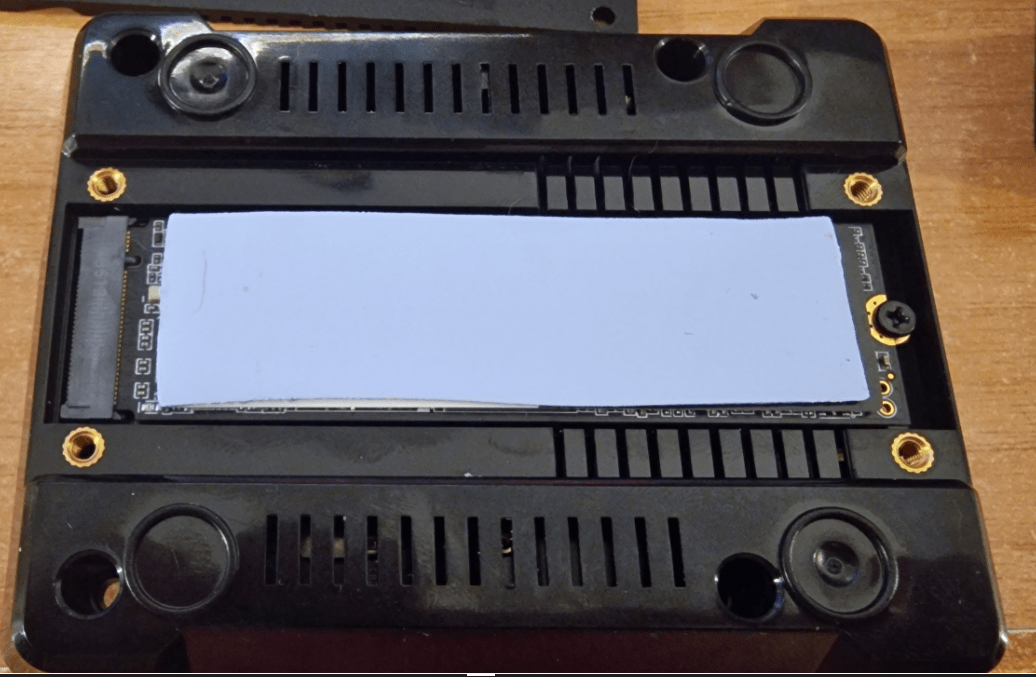
In the bottom of the case fits the M2 NVME. For reasons originally beyond me, once the case is fitted up – you can’t access the SD from the outside – but as the RPI5 can be set to boot from NVME/SSD etc first I guess there’s no harm in leaving the SD inside for cloning. Should the NVME fail of course then with a dead RPI, you’d have to open the case to disconnect the NVME to allow the RPi5 to boot from SD.
Anyway, here is how the case and M2 NVME drive arrived…

Initially I felt daunted but in fact the whole assembly – RPI into case, SSD lead attached, fan attached – all took maybe 10 minutes.
No screwdriver supplied but 3 thermal pads and the RPi5 to SSD connector (and a spare) were all included along with 6 bolts (one of which (corner) I could not initially get to stay put – thankfully nothing speciat about these screws so I found one in my pile that fitted). Finally 4 tiny rubber feet included. All looks quite neat on my bench.

A script is provided to set up the NVME – not used it, I simply used the RASPI-CONFIG program to set my RPI back to booting from SD, put the lot together, turned on and…
As you can see, rather than SDA etc for SSDs, there is an nvme0n1 in there, so on booting from SD, I set rpi-clone off making a clone.. then told raspi-config to boot off NVME now first.
In the terminal after booting, I typed in the following code which then returned “nvme0n1” – which told me that the RPi5 had booted correctly from the NVME. I’ve since checked that in fact in this mode, RPI will boot from nvme, THEN SSD THEN SD. So really I can use an SSD (on USB) for backup if I want – saves messing with SDs at all… and of course as always, the (modified for RPi5) rpi-clone makes it so easy.
lsblk -o pkname,mountpoint | egrep '/$' | cut -d' ' -f1

So – up to now – happy. Nice looking case, operating perfectly apart from that last underside mounting bolt… I guess I’ll try the Argon40 recommended script next.
Oh, I got the whole construction sorted from the tiny manual they provided without having to go looking elsewhere. All it needs now is a go-faster stripe.
February 2025 Update
So, that was the plan, use the NVME as a simply go-faster mechanism. Since then things have changed a lot, the NVME has proven to be completely reliable, but recently as I started to expand my Home Assistant setup, I was still using the SD with the NVME for (all important) backups and noticed that HA was starting to slow down. My friend Antonio suggested we move to native HAOS and move from the RPi to a Zimaboard I’ve had for some time – as it has NVME built-in. This we did (not such a big deal as Home Assistant backups are easy to create and restore), especially in the 2025 Home Assistant updates.
Despite 32GB being the norm for the likes of the HOME Assistant Yellow board, I felt a little uncomfortable with the Zima as my original HA setup on Docker on the RPi quickly expanded to above 32GB. I decided to take another look at the RPi5 and that Argon40 with internal 128GB NVME.
On the Home Assistant site they directly question the wisdom of booting from NVME on the RPi5 – and recommend booting from SD with the majority of HA and all of it’s data residing on NVME – a 1-button (seemingly non-reversible) operation. The Argon 40 case is ideal for this – everything is enclosed including the SD and hence protected and there is plenty of storage for the future. I have the RPi5 with 4GB.
This was amazingly easy – starting with an SD-based HAOS, I easily backed up EVERYTHING to my NAS drive (a recent improvement to HA allows this) and told HA to use the NVME for data and much of HAOS itself – hence ensuring read-only use of the SD. I now have this running my home automation (which spans 2 countries) and have set up nightly automatic backups to both my NAS and to the RPi NVME (better safe than sorry).
I also create manual backups to the NVME (takes just a couple of minutes and no effort) before any changes of which I’m not 100% confident – hence I can continue to expand my home automation without fear of problems or running out of space or ending up in trouble – AND I’ve noticed, between (reluctantly) moving from Docker-based Home Assistant to native HAOS and from SD to NVME, a considerable improvement in speed and responsiveness.
Finally, I’ve recently moved to 5G for my broadband supply (new mast in the village) – with up to 800Mbps download speed and I moved HAOS back to the Zimaboard as the Speedtest add-on for Home Assistant showed completely incorrect download speeds (60Mbps) on the RPi, but accurate to within 20% on the Zimaboard. But wasn’t that a lot of work? No, simply pressing restore on the ZIMA to the last NAS backup from the RPi – could it be that simple? Yes, absolutely.
March 2025 – moving on – Zima is great but not really fast enough for AI security camera stuff in HA, so trying out HAOS in Virtualbox on mini-PC… so far so good – hey – things change…. Seeed Studio also warn about inadequate hardware power for the Home Assistant Voice Preview Edition. More on that when I get the latter.
Just for fun – and a side bet with Eben – I now have one of my Replica AstroPi cases equipped with a Pi 5 & NVME SSD. It looks a little rough because my hand filing skills are decidedly rusty, but so what?
Ok, THANK YOU for that Tim – I’ll just leave this here… and come back to it when I find out why my WordPress hosting DB just went down… I asked Argon40 yesterday – it will be interesting to see how long it takes them to come up with what you just did 🙂
THe Pi 5 fan can be controlled by dtparam settings in the /boot/firmware/config.txt file
There’s a long README file in there but it’s perhaps more convenient here – https://github.com/raspberrypi/firmware/blob/master/boot/overlays/README
You can do settings for the fan-headers, gpio fans, POE HAT fans, and i2c fans.