When testing Node-Red, the common INJECT node is invaluable. Indeed it is just about the only way to instantly inject information into another node. Here is a typical example.
It doesn’t get any simpler than this. Here I have merely dropped an “Inject” node onto the Node-Red working surface along with a “Debug” node. I’ve made no changes to either of them. Note that “inject” and “debug” nodes come as standard with Node-Red.
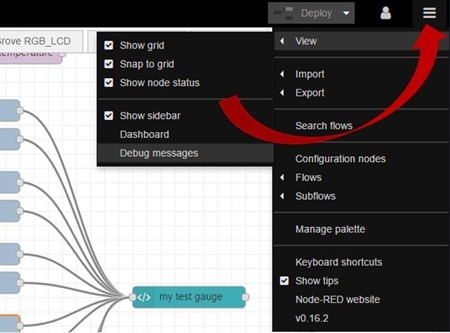
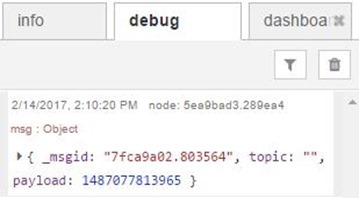
Correctly set up, on the right of the Node-Red screen, you can see (or make available via the top-right three horizontal bars – view – “debug messages”) a debug window and simply by pressing that button-like item to the left of the inject node, you can put a timestamp into the debug window as such:
Simple enough. Note that this says (in red) “msg.payload”. In homage I guess to MQTT, the inject node outputs a simple object which deals primarily with msg.topic and msg.payload. You can use these for whatever messages you want. The debug node by default shows only msg.payload but you can of course change this to show the entire message object.
Note that here (image above) we also see a blank topic (because the unmodified inject node has that as empty – you could put “Merry Christmas” in there if you like. Also included is _msgid which is of no interest to us for now unless you have a specific need for a unit number.
In general then, you can fire out msg.topic and msg.payload from the inject node. Instead of putting out a timestamp, you can put out a string (for example “Hello world”) and this is output in msg.payload.
Expanding the INJECT output
For many purposes, we are done – you know know how to output a value into msg.payload and you can easily add msg.topic to that. An inject node then can directly output data suitable for, say an MQTT node which needs both msg.topic and msg.payload.
For some purposes however, this is not enough.
In the above image, I need to inject one of two messages into a template. Easy enough, “message 1” as string into one injector, “message 2” into another. But what if we have a string of messages for different purposes going into that template?
On way to differentiate them would be to use topic.
if (msg.topic==”needle1”) { /*use msg.payload to influence a gauge needle */ }
if (msg.topic==”lcd”) { /* use msg.payload to influence a display */ }
Another way to do this is by putting a function node after the inject node…
msg.needle=msg.payload;
The output of this then, is your message sitting inside msg.needle instead of msg.payload.
Do-able but two things about that. Firstly you still can only output one message at a time and now you have the extra work and additional screen real estate used up for the additional function node. Not very elegant. If that works for you – stop here.
So what if we want a simpler way that may include sending multiple messages out at once.
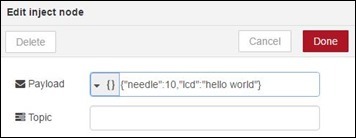
In the inject.node you can’t change the name of “msg.payload” – but you can change what it outputs – a number, a string etc.. and in this case of particular interest, JSON.
Let’s take an example. Let’s say that by pressing the test button we want to set a needle value to 10 AND we want to send the message “hello” to an LCD display in our gauge.
This LOOKS like you are sending a string of text but look what comes out – when you view the debug payload:
Not a string, but an object – but how do you make use of this? Simple. In your template – or function or whatever you are firing this message into:
if (msg.payload.needle!==undefined) { /*make use of msg.payload.needle */ }
if (msg.payload.lcd!==undefined) { /* make use of msg.payload.lcd */ }
This way, directly from a single inject node you can send either one, or several messages at once. The check for undefined means you don’t always have to send all of them.
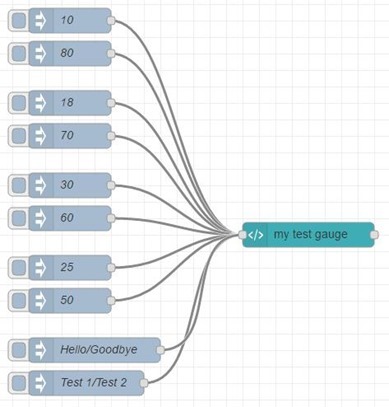
Hence, for example, in testing my gauge, I can have a number of buttons testing different parts of the gauge and one of them sending messages to both lines of the internal LCD at once without making a big mess of the screen. In the example below, the bottom two injects each send 2 different commands to the gauge when pressed.
But what about existing objects
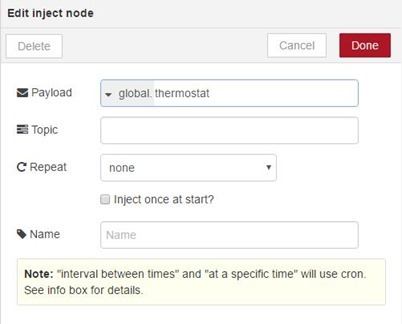
Another way to send multiple messages through the injector allows you to make use of existing global objects…
In this example, I happen to have an existing object called “thermostat” – which can be referred to as “context.global.thermostat” though the more modern way to do that is by use of global.get and global.put.
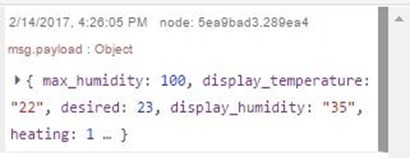
Armed with the above, which contains in this case lots of information about the state of my house… I can send that – either manually or of course in a timed fashion, to the debug node.
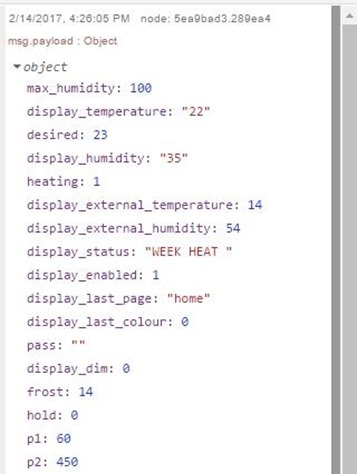
A little confusing at first until you notice the three dots at the bottom… which mean “I’m only showing you some of the result. Click on them and..
Far too much information to display here – but I think you get the point – though msg.payload looks restrictive – in fact you can send a whole load of information thanks to the ability of the INJECT node to carry an object in msg.payload.
In this case, if you set DEBUG to look for msg.payload.desired you will indeed see a result of 23.
Can I create an object? Sure:
In this case – the content of the injector is irrelevant. Just drag it onto the screen. Here we have (for the sake of it) two debug nodes – one is looking for msg.payload.actual and the other is looking for msg.payload.desired.
And here are the contents of that simple function node in the middle.
msg.payload={
desired:25,
actual:23
}
return msg;
Debugging: Keith Howell wrote in to remind me about node.warn and node.error – two very handy debugging functions. Here’s an example of use…
Again out of sheer laziness I’ve used the inject node on the left straight out of the box as it were. On the right the orange “test” function – again – drag from the left… double-click to open and enter the following:
node.warn(“just info, really!”);
node.error(“ooh errr!”);
and the result in the debug area when you press the timestamp button…
Isn’t that handy – the only difference here being the colour – yellow for warning (I’d have used blue but hey ho) and red for error. Using this instead of a debug node could save a little real estate on the screen in some cases.








Great explanation Pete!
Another useful thingy when dubugging your code in the function node is the ‘node.warn’ and ‘node.error’ facility.
By adding something simple to your code like node.warn(“Loop counter “+i); you can easily check variables as the code executes.
I’d totally forgotten about those, Keith and I’ve updated the blog accordingly with a slightly simpler example of use. This just keeps getting better. Thank you.
What about one or more object IDs in the topic and one or more values in a payload field called value?
Clearly, the INJECT node provides the ability to accept an object in the payload – it does not accept an object in the Topic. As you can have as many items as you like in the object in the payload, this seems a moot point – however (though it somewhat defeats the object of simplicity) you could pass a JSON message in the topic but you’d have to decode it yourself at the other end. As discussed in the blog, you can put as many values as you like within reason into the payload.
{“value”:20,”value2″:”hello”,”colour”:”green”} etc etc..
ObjectIds in the topic don’t need to be encoded using JSON. They can simply be delimited strings. Also, an objectID in a topic does not need to refer to each individual measurement, but a named group of measurements.