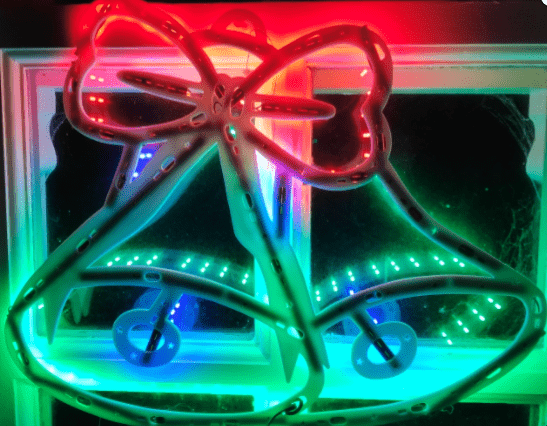
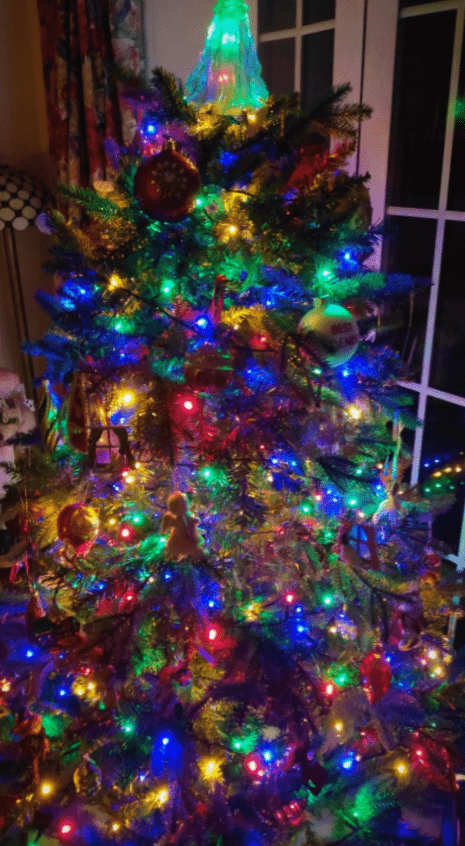
My ESP8266 home control code ESP-GO doesn’t get a lot of attention in 2020 as I’m a “Tasmota” fanatic but that does not mean that ESP-GO is dead – far from it. ESP-GO contains not only RGB code for serial 5v LEDs but also a complete programming setup to generate and loop sequences… and so with merely one wire and VERY little work, we end up with some fancy animation. Add that and another, simpler display to a load of more conventional Christmas lighting and….

The Animated LED Christmas Window Ornament
As I understand it , WLED software now supports functionality called SEGMENTS shich should allow similar functionality – perhaps more – but I hope no-one forgets that the ability to split up to 300 WS2818 LEDS into arbitray groups with animation support has been a standard part of ESP-GO for 3-4 years. I put so much into ESP-GO that this particular feature along with the LED CLOCK don’t get much of their own coverage. I noted today (April 15, 2020) DrZzs getting quite animated about the segments feature. Old news but I should hand it to the author of WLED that it looks good. I’m hoping there is room left in Tasmota to fit in LED segments like this – as it is possible to do other things at the same time in Tasmota.
I wrote the original version of the code for this beautiful Christmas decoration in December 2017 – when we lived in a different house with a completely different WIFI setup and of course I put this gadget in the loft and forgot all about transferring the Node-Red code across to the new house Raspberry Pi (at the time I was a little busy having an ischemic stroke). So today when I powered up the ESP12 and nothing happened I got very close to throwing the lot in the bin. As I had an hour to spare (there is an issue with the present development release of Tasmota so I’m having a half-day break to avoid frustration) I put an FTDI on the generic ESP12 board (inside the decoration) and put in my current WiFi and MQTT credentials.
The only things that changed were WiFi ssid and pass, along with the IP address of my local MQTT broker. Thankfully all else remained the same. Thank heavens for the blog. I’ve made tiny changes to the Node-Red function to reflect a more modern way of using global variables – otherwise this is the 2017 project and it works a TREAT..
Above you see an old, gutted plastic Christmas window decoration which WAS originally filled with pretty grim, old fashioned white lights but now has a string comprising a 94 (5v) serial LED string running animation around the inside.
For anyone using my ESP-GO software and wanting to knock up a quick Christmas animation – here it is…
My code lets you refer to a string of RGB lights – up to 300 of them and do things like: make the first 10 LEDs RED and pause them for a second, then make the second 20 LEDs GREEN and wait for 5 seconds, clear the lot, wait 1 second.
That sequence will then continue forever in a loop – and that’s just a trivial example – here in THIS decoration I set up a nice colourful display (the actual plastic unit is white – no colour at all and the cat has nothing to do with anything but in 2019 she’s still here, still needy and still keeps us up at night).

The top unit is now INCOMPATIBLE with pre-2017 code so if you have something already running from 2016 when I FIRST wrote about ESP8266-sequenced Chrismas lights, you’ll need to add a new first parameter (1) to keep compatibility.
Here is how to make a Christmas ornament as in the candle light above with sequencing yellow-white-blue-ish tips…
if (msg.payload=="reset") .global.set("stepper",0);
var steps=[
"{rgbstop}",
"{rgbstart:12,94}",
"{rgbadd:1,8,22,255,0,0,5}",
"{rgbadd:1,36,24,255,0,0,5}",
"{rgbadd:1,66,20,255,0,0,5}",
"{rgbadd:1,0,8,0,255,0,5}",
"{rgbadd:1,86,8,0,255,0,5}",
"{rgbadd:1,60,6,255,255,0,5}",
"{rgbadd:1,30,6,255,255,255,200}",
"{rgbadd:1,60,6,255,255,80,5}",
"{rgbadd:1,30,6,255,255,150,200}",
"{rgbadd:1,60,6,255,255,150,5}",
"{rgbadd:1,30,6,255,255,80,200}",
"{rgbadd:1,60,6,255,255,255,5}",
"{rgbadd:1,30,6,255,255,0,200}",
"{rgbadd:1,60,6,255,255,0,5}",
"{rgbadd:1,30,6,255,255,255,200}",
"{rgbadd:1,60,6,255,200,40,5}",
"{rgbadd:1,30,6,255,255,150,200}",
"{rgbadd:1,60,6,255,255,80,5}",
"{rgbadd:1,30,6,255,255,120,200}",
"{rgbadd:1,60,6,255,255,200,5}",
"{rgbadd:1,30,6,255,255,30,200}",
"{rgbadd:1,60,6,255,255,0,5}",
"{rgbadd:1,30,6,255,255,00,200}",
"{rgbadd:1,60,6,255,200,80,5}",
"{rgbadd:1,30,6,255,255,130,200}",
"{rgbadd:1,60,6,200,200,150,5}",
"{rgbadd:1,30,6,255,180,80,200}",
"{rgbadd:1,60,6,255,255,200,5}",
"{rgbadd:1,30,6,255,255,0,200}" ];
msg.topic="xmas/toesp";
msg.payload=steps[global.get("stepper")];
global.set("stepper",global.get("stepper")+1);
return msg;
In the node-Red code above, I wait for the ESP21 board to login as usual – and when it does I sent it a sequence of instructions, once, which will set up the display. Once set the code will do nothing more. Purple nodes are MQTT talking to the display unit which is called “xmas”
That function that says “Continue until end of array is merely this..
if (msg.payload!==undefined) return msg;
I’ve also included an “inject” mode for manual testing. It merely sends out text with the word “reset” in the payload.
Looking at the list above, the first command stops anything already running. The second sets up 94 LEDs on GPIO12 (count is the second parameter).
An example of a simple light up is the third instruction – code 1, from LED 8, light up 15 LEDs in RED (255,0,0) for 5ms.
The other instructions are the same, lighting up segments of the display for X amount of time, I do the tips of the candles in white, wait a while then change them to yellow – the rest of the display is static – of course one could be a HELL of a lot cleverer than that. This is all noted in the WORD document for the ESP-GO code on BitBucket.
There is also a command 4 which means END – you’d only use that if you wanted to perform a series of loops and then stop permanently. That has no parameters.
Assuming you’ve used the latter and have a sequence which does whatever and then stops – it might be nice to store this in FLASH and recall it when needed. There are four non-volatile buffers available to store this information.
{rgbstore:X} where X is 0-3
You can play back any of these as below, again assuming in this case GPIO12 and 12 LEDs. Set X to be 0-3
{rgbrecall:X}
{rgbstart:12,12}
The above will play back a stored sequence immediately.
The code is in the usual place and available via the OTA. See Home Control blog.
As you can imagine – you could set up a LOT of this stuff as the code is only sent out once. Limits are 1 strip of up to 300 RGB serial LEDs per ESP8266.
Now all we need are a few hundred ordinary lights and the tree…

The 60-Segment LED CLOCK
While I’m here, an even earlier feature of ESP-GO, today being emulated by others is the LED CLOCK.

A simple command {clock:12} for example will start a serial RGB LED clock on GPIO12 and this will be maintained through power cycling. The clock knows the time because the central server (Pi or similar) usually used with ESP-GO sends the time in the logon system and every day thereafter.
The clock uses serial LEDs and needs 60 of them. You can do this with some RGB serial LED strip – or you can buy make sure you get the right one – 60 LEDs – black PCB works well.
So, you see the blue seconds hand, the green minutes hand and the red hours hand. Looks lovely if you can come up with a suitabl case.


My bad, I didn’t understand how the Home Control code was supposed to work and a faulty series of lights didn’t help. With new LED lights, the original code works well.
Didn’t help that I was powering the ESP12 AND the lights from the USB socket on my lappy so I could send commands via YAT (a nice find by the way).
Thanks Peter.
Perhaps one for you to look at next year, but WLED flashed onto an ESP2866 Dev board makes a brilliant controller for RGB LED strips. I haven’t used it’s MQTT integration but I did control about 1000 LEDs (from a single Dev board) using Xlights/XScheduler to send it E1.31 commands. It can control far more than a thousand LEDs but I ran out of time to build more! XScheduler also works with MQTT so I could synchronise the turning on of static lights as well.
As neither costs anything I may try one of each. Early tests of WLED showed rather crude fading.
I might have missed something but I needed to make some changes to make this work. The “Continue to end of array” function needed this:
if (msg.payload===undefined) msg.payload=”reset”;
return msg;
… while the “check for powerup” needed this:
if (msg.payload==”powerup”) {msg.payload=”reset”; return msg;}
Regards
Interesting – works for me — well, at least you are up and running – I hope you have fun making animated Christmas lights
Can you elaborate on “the usual place”? I’ve checked for prior blog entries as well as github and can’t find anything =(